Thursday, March 29, 2018

A photo light box to show case my plant hangers

Though I'm not the greatest photographer anyway, taking good pictures of my plant hangers for my Etsy shop is especially hard to do.
I've thought about making making just a shallow roombox with a series of tiny hooks at the top, but figured that would only solve one problem. After some Pinterest research I came up with a combination of such a roombox and a photo light box.
Just a diy from a cardboard box, but personalised and pretty ;)

I covered the inside with a nice, but neutral wall paper and
used an old curtain to cover both the openings. At the top
there's a little overhang for multiple hooks.

Of course I wanted the outside to look nice
as well (a) 

I've not added a floor so I can put it an anyunderground
I want, even outside, or just put a white paper underneath.

It looks like Harry is enjoying a bit of sunshine, isn't it? :)
There are 5 hooks already and I can add more in the future.

There's an opening at the top for plain white
paper or maybe change the background
temporarily.

This is how it looks then. Great when I want a photo of a
single item, instead of making a nice scenery.

And when I'll have lights on the sides, there
won't be shadows like there are now.

Time to make new plant hangers now :)

Wednesday, March 28, 2018

Craft of the Month: a new challenge

A few weeks ago Jolinda had told me about another (Dutch) FB group Actieve Poppenhuisforum where they organise a monthly challenge that sounded like fun. So I've joined the group and decided to give this month's challenge a shot :)

You were supposed to make something with the following 5 materials:
1. fabric
2. card board
3. beads
4. nails
5. wool

You had to pick at least three materials. Two were optional or could be changed in something else. Paint and glue was free to use.

The materials reminded me of a tutorial for an arm chair I'd seen in last month's doll house magazine (P&M no. 154). I knew Wil wanted to make that chair as well, so we met last sunday to craft :)

We'd each cut the different parts out of card
board before we met to save some time. It took
me an embarrassing amount of time to figure
out how to put them together. In my defence:
the instructions weren't anything but clear ;)

I had a great afternoon with Wil working on the
arm chair. We covered the card board parts
with fabric and managed to put almost
everything together before she left.

I chose a nice off white fabric for the
arm rest and the front ...

...and a deep red embroidery thread as trim.

Even without cushions and legs it already
looks very comfortable :)

Measuring fabric for the cushions.

No sewing thread allowed, so (textile) glue it is.

Three layers of fiberfill seemed comfy enough.

Checking the length before closing the cushion.

Made the legs from card board (3 layers),
painted and varnished them.

Et voila :) I'm glad I choose nails instead
of beads in the end.

Despite the touches of red, I think it looks
neutral enough to serve as a background for
most of my plant hangers and cross stitched
pillows. Especially since I can change the
floral cushions for some with plain fabric.


Tuesday, March 27, 2018

Pretty in pink


"... now I've no more excuses left to not start shaping the clematis leaves and flowers," I said last week.
So what did I do? Anything but shaping leaves and flowers (a) Well, I did a few, but then I got distracted ... again.
I filled the planter with potting soil (mostly clay with a mixture of ground coffe from a coffee pad and tea from a tea bag glued onto it). While looking for some left over coffee and tea, I also found the box with the other bamboo items we made together, so I've added the bird house, the round planter with tulips and the broom to the scene.
The black bird, which Kim from Bibbidi Bobbibi Boo had made me, has found its definate place. Sitting on a broken flowerpot, a bit hidden between the garden bench and the lilac planter he's enjoying small bites of apple. The Kneazles are both made by Kim as well!

Did I originally think about putting an old man on the bench, perhaps smoking a pipe, suddenly I got the image of a little girl playing with a pet :)
I happened to have these two little christmas angels, so I gave the little redhead an make over :)


The top is reversible, so did I want to dress her in a top with 
roses and a pink skirt or the other way around?


I choose the little roses for both the top and the skirt, with some pink accents, but didn't attach the skirt to the top, so I'll be able to change her outfit if I make another skirt in the pink fabric.


I'm normally not into the (miniature)babyrooms and pink dresses but I have 
to admit, this little girl in her pretty dress has already stolen my heart ;) 
She's also the first of my dolls, for whom I sewed an outfit and I enjoyed making this 
dress more than I anticipated, so maybe Harry, Draco and Sophie will be next ^^


Well, time to continue with the leaves and flowers, right? Or should I .... ;)


Tuesday, March 20, 2018

Crafting together - March

Last week we had our monthly miniature club again. I thought I should call it a (little) club from now on, because we welcomed a new and enthusiastic participant, Monique ;)
Because she has small children, we'd moved the meeting to her place, so there was a lot of talking, getting to know each other and looking at her miniatures and dolls house beside crafting of course.
After working with Fimo for the last few times, we'd decided to continue with our roombox/garden project and to work on a climbing plant, so Monique could join in.
Jolinda and Monique choose to make an ivy, while Wil and I wanted to do a clematis.
We all started by painting thin shoebox paper and once both sides were done and dry, we each choose a paper punch to work with. In between Jolinda and Monique started with covering wire with paper for the branches, while Wil and I wanted to use the dried strawberry roots I still had.
It was a very enjoyable afternoon and before we left we already picked a new date for April!


I figured I'd need so much more though, so I painted more paper the next day.


So then I spent hours paper punching leaves and flowers :') 


Before I could start with the branches and twigs I made a trellis from Balsa wood. Just a simple design I remembered from my parental house, because that seem to fit in this small box.


I painted a planter made from bamboo lilac to match the colour of the clematis, and then started with the flagstones. I've wanted to try making these for some time, and this seemed like the right scene to have some :) I used a tutorial from Once Upon a Doll Collection as a guidance to start.


Tearing cardboard egg cartons in different colours of gray and brown into random stone shaped pieces, getting the shapes to fit together took more time than I anticipated :)


Then I dry brushed the stones with different colors of white, brown, gray and black. Not a technique I'm very comfortable with so far, but I really like how I managed here ^^ Especially after I added some green with yellow flock between some stones.


After taking this last photo I've also added some matt varnish (very carefully because of the flock).
So now I've no more excuses left to not start shaping the clematis leaves and flowers :)


Monday, March 19, 2018

Fair in Spijkenisse

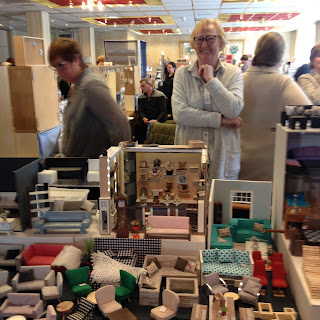
Yesterday I went to a dolls house and miniature fair in Spijkenisse with Jolinda, her sister Irna, and Monique, the newest member of our montly miniature club.
I've only been to the fair in Rijswijk so far, so I was looking forwards to meeting some new exhibitors as well as seeing some familiair ones. Although there were a lot less exhibitors (33 to the approx. 60 in Rijswijk), we spend as much time here, and I was just as exhausted afterwards ;)
I had a wonderful day, saw lots of beautiful miniatures, and wish I'd known then that I would be selling four planthangers this morning. But .... maybe it's better I didn't ;)


I've randomly taken some photo's of things I liked or overview pictures to show you how it looked. I hope you like them. If possible I added a link to the (web)shop or shopowner.


Reneeltje:


I think here I might find a radio for the Hogsmeade cottage so
Bianca and Penny can listen to the Wizarding Wireless Network.


Other exhibitors who were in Spijkenisse: Afelien, Anja’s Handwerkatelier, Caatjes Poppenhuis Miniaturen, CreaParadijs, Creatief in Mini’s, DEJOJO, Fennicole Miniaturen, Van Hameren, De Hobbyshop, Kuijs, Maison Edith, Matozi Art (Jacomini’s), Meubels in Miniatuur, The Mini Factory, Miniwaar, Mini Wonders, MKO Miniaturen, Van Soest, Stellaquepassa, Vlinder Koudporselein, Van der Waal, De Zilveren Engel en Zus en Zo Miniaturen.


Jolanda’s Miniaturen:

Explaing how to use the chalk paint.


Jolinda and Inra were interested in wood and veneer at Bibian's.


And, yay, the pretties I bought :)

A mould for a loaf of bread @ Stella Que Passa and chalk paint
@ Jolanda's Miniaturen, beside the things I show separately.

So pretty! <3 From Fennicole Miniaturen

For making vegetable soup in the cottage? :)
From De Kleine Pimpelmees

Fabrics from The Mini Factory