Showing posts with label clothing. Show all posts

Wednesday, November 2, 2022

Crafting together (October) - Finding Mrs. Santa again + a swap

Last week we've been crafting together again. It hadn't occurred to me that it'd been my birthday the week before, but Jolinda obviously hadn't forgotten and had made several Fimo vegetables for me. Very nice! A basket with cucumbers and aubergines and a board with sliced ​​onions, with the rings were visible due to the the transparent clay.
I'm not sure whether they will end up in the cottage or the Italian trattoria, but it will fit well anyway :)

Afgelopen week hebben we weer samen geknutseld. Ik had er niet meer bij stil gestaan dat ik de week ervoor jarig was geweest, maar Jolinda was het natuurlijk niet vergeten en had verschillende groenten van Fimo voor me gemaakt. Heel erg leuk! Een mand met komkommers en aubergines en een plankje met gesneden uien waar de ringen door de transparante klei heel mooi zichtbaar waren.
Of ze in de cottage of de Italiaanse trattoria terechtkomen weet ik nog niet, maar het gaat sowieso goed passen :)


We'd agreed to work with Balsa this month instead of clay.
However, it turned out that Jolinda didn't have much inspiration for woodworking and decided to continue with her Santa Claus. I thought that was a very nice idea, so I decided to look for my Mrs. Claus again.
This is how I found her in the box of miniature Christmas items. Apparently I was a little further along than I remembered ;)

Voor de verandering hadden we afgesproken deze maand weer eens met Balsa te werken.
Jolinda bleek daar echter toch niet veel inspiratie voor te hebben en besloot verder te gaan met haar kerstman. Dat vond ik ook wel een erg leuk idee, dus besloot ik om mijn kerstvrouw weer op te zoeken.
Zo vond ik haar in de doos met miniatuurkerstspullen. Blijkbaar was ik al iets verder dan ik me herinnerde ;)


It took some time trying to pick up where we left off last year, but soon we were both sewing. I had a problem with the underskirt; it didn't show evenly under the top skirt, so I decided to sew both skirts together at the bottom. And I also made a start with the puff sleeves of the blouse.

Het koste wat tijd en gepuzzel voor we allebei weer wisten waar we precies gebleven waren, maar al snel zaten we beiden te naaien. Ik had een probleem dat de onderrok niet mooi gelijkmatig onder de bovenrok zichtbaar was, dus besloot ik ze aan de onderkant aan elkaar te naaien. Ook een begin gemaakt met de (pof)mouwen van de blouse.


The next day, however, I unpicked everything again because I wasn't happy with it; the skirt was puffed up and the back was 1 cm shorter than the front. Something I'd be able to hide with the apron, but no...it would still annoy me :)

De volgende dag heb ik echter alles weer losgetornd omdat ik niet tevreden was; de rok was opgebold en verder was de achterkant ook 1 cm korter dan de voorkant. Iets wat ik wel kon verbergen met de short die erover gaat, maar nee ... het zou me blijven ergeren :')


First I hemmed the skirt again so that the bottom was straight. I thought I'd still have to remove the whole underskirt, but to my surprise it turned out just right ;) I then noticed that the upper skirt was  about 5 cm wider at the bottom than the lower skirt; no wonder that it kept bulging ^^

In eerste instantie heb ik de rok opnieuw gezoomd zodat de onderkant gelijk hing. Ik dacht dat ik de onderrok er daarna uit zou moeten halen, maar tot mijn verrassing bleek die opeens precies goed te hangen ;) Wel zag ik opeens dat de bovenrok gewoon zo'n 5 cm wijder was aan de onderkant dan de onderrok, geen wonder dat die bleef opbollen ^^


So I cut away two pieces at the back of the top skirt and then sewed everything neatly back together.

Ik heb dus aan de achterzijde twee stukjes weggeknipt en daarna alles weer netjes aan elkaar genaaid.


The skirts now hang neatly but aren't attached, the front and back are the same length and although it is still a bit on the wide side, at least it doesn't bulge anymore so I'm satisfied.
Now I can continue with the blouse and the vest :)

De rokken zitten nog los van elkaar maar hangen nu netjes, de voor en achterzijde zijn even lang en hoewel hij nog steeds wat aan de wijde kant is, bolt hij in ieder geval niet meer dus ik ben tevreden.
Nu kan ik verder met de blouse en het hes
je :)


You can see how Jolinda's Santa is progressing here on her blog.

Hoe de kerstman van Jolinda vordert, kun je hier zien op haar blog.

Tuesday, March 27, 2018

Pretty in pink


"... now I've no more excuses left to not start shaping the clematis leaves and flowers," I said last week.
So what did I do? Anything but shaping leaves and flowers (a) Well, I did a few, but then I got distracted ... again.
I filled the planter with potting soil (mostly clay with a mixture of ground coffe from a coffee pad and tea from a tea bag glued onto it). While looking for some left over coffee and tea, I also found the box with the other bamboo items we made together, so I've added the bird house, the round planter with tulips and the broom to the scene.
The black bird, which Kim from Bibbidi Bobbibi Boo had made me, has found its definate place. Sitting on a broken flowerpot, a bit hidden between the garden bench and the lilac planter he's enjoying small bites of apple. The Kneazles are both made by Kim as well!

Did I originally think about putting an old man on the bench, perhaps smoking a pipe, suddenly I got the image of a little girl playing with a pet :)
I happened to have these two little christmas angels, so I gave the little redhead an make over :)


The top is reversible, so did I want to dress her in a top with 
roses and a pink skirt or the other way around?


I choose the little roses for both the top and the skirt, with some pink accents, but didn't attach the skirt to the top, so I'll be able to change her outfit if I make another skirt in the pink fabric.


I'm normally not into the (miniature)babyrooms and pink dresses but I have 
to admit, this little girl in her pretty dress has already stolen my heart ;) 
She's also the first of my dolls, for whom I sewed an outfit and I enjoyed making this 
dress more than I anticipated, so maybe Harry, Draco and Sophie will be next ^^


Well, time to continue with the leaves and flowers, right? Or should I .... ;)


Wednesday, February 21, 2018

Nightgowns and Dutch foot stoves

Making a nightgown and a cap for a 12th scale doll can be challenging, especially when the only item of clothing you've made so far is a wizard cloak.
However, if it's a birthday present for a good friend, you'll give it a shot anyway :)
But when the doll can't try the nightgown every now and then, because he's living across the pond; when he's handmade and isn't exactly on scale, and when he even doesn't have feet (yet), it becomes nearly impossible ;)
But after starting over and over for a couple of times, I finally figured out a design (based on the picture I'd gotten) :)

My third attempt :)

Still too wide (a)

Finally sewed all seams, for the hemming
I'll use textile glue.

Deciding on the trim.

Looks very big, but Harry isn't very tall xD

Draco only wanted to model the cap. Once!
Because it messed his hair too much :D

Footless or not, I also made some slippers
and a foot stove to rest his ... uh ankles ;)

Final touch; two snap fasteners at the back, to make sure
it'll fit a British wizard.


When I get pictures of the elderly British wizard, I'll definately show them but for now ...

I convinced Harry to model one more time
be putting a nice armchair in the scene ...

...though he complained about the fact that I
gave him a book but then forgot to hand
him his glasses :')


After my friend had received the parcel,  I discovered that a foot stove isn't very common in Brittain, so I had to explain that it isn't a little table :)
A foot stove consists of a wooden box which is open on one side, with holes at the top. In it, a bowl made of pottery or metal with burning charcoal was placed. The feet were positioned on top of the stove to become warm. By putting a blanket or clothing on the legs the heat could be isolated and the lower legs were heated.
I also didn't know that it's a typical Dutch foot warmer. I remember my grandparents having them (not sure my parent did at one time), so it's nice to learn more about it accidentally.
So, I'd like to share that infomation of course.


Dutch foot stoves
 Mid-17th century paintings with women using 
foot warmers of the fire pot in wooden box kind. 
All by Dutch artist van Brekelenkam.

The Dutch used to be known for a certain kind of foot warmer found alongside other household furniture: a pierced box with an earthenware or metal pot holding glowing coals inside. They called it a stoof (stove) and you can see it in countless paintings from the 17th century on, like this one by Cornelis de Man c1670.
These foot stoves were also common in northern Germany. A stone slab was an alternative to the wooden top with holes. Similar foot-warming “boxes” were known in other countries too: see this French chaufferette. In Britain open fires were the most popular way of warming yourself indoors and foot warmers were not much used in the home, but some craftspeople had an earthenware pot of coals for heating their workshop, and this might be placed under a footstool.
Foot warmers are visible in the paintings, but they could be completely hidden under a long skirt or cloak. They were used more by women than men. Did men’s boots keep them warmer?
 Typically Dutch foot warmer (top) without its inner pot. 
Also a foot-warming "stove" from Northern Germany 
with stone top. Photos by Johan and Nyks

Saturday, May 20, 2017

Crochet shawl

I enjoyed learning the waffle stitch, which is great for cushions, blankets and throws. But I always want to learn something new and challenge myself just a bit.
So yesterday I found this (Dutch) pattern on Wolplein.nl for a 1:1 shawl and I decided to give it a try ;)
I assumed I needed to addapt the pattern a bit for a 1:12 version, but I didn't.
Using DMC Perle Cotton Thread Ball Size 8 no 781 and my 0.60 mm crochet needle it turned out to be the perfect size. Well, I only did 14 rows instead of 34 rows, but I followed the pattern itself.
Love making this one, so there probably will be more in the future :)


Monday, June 6, 2016

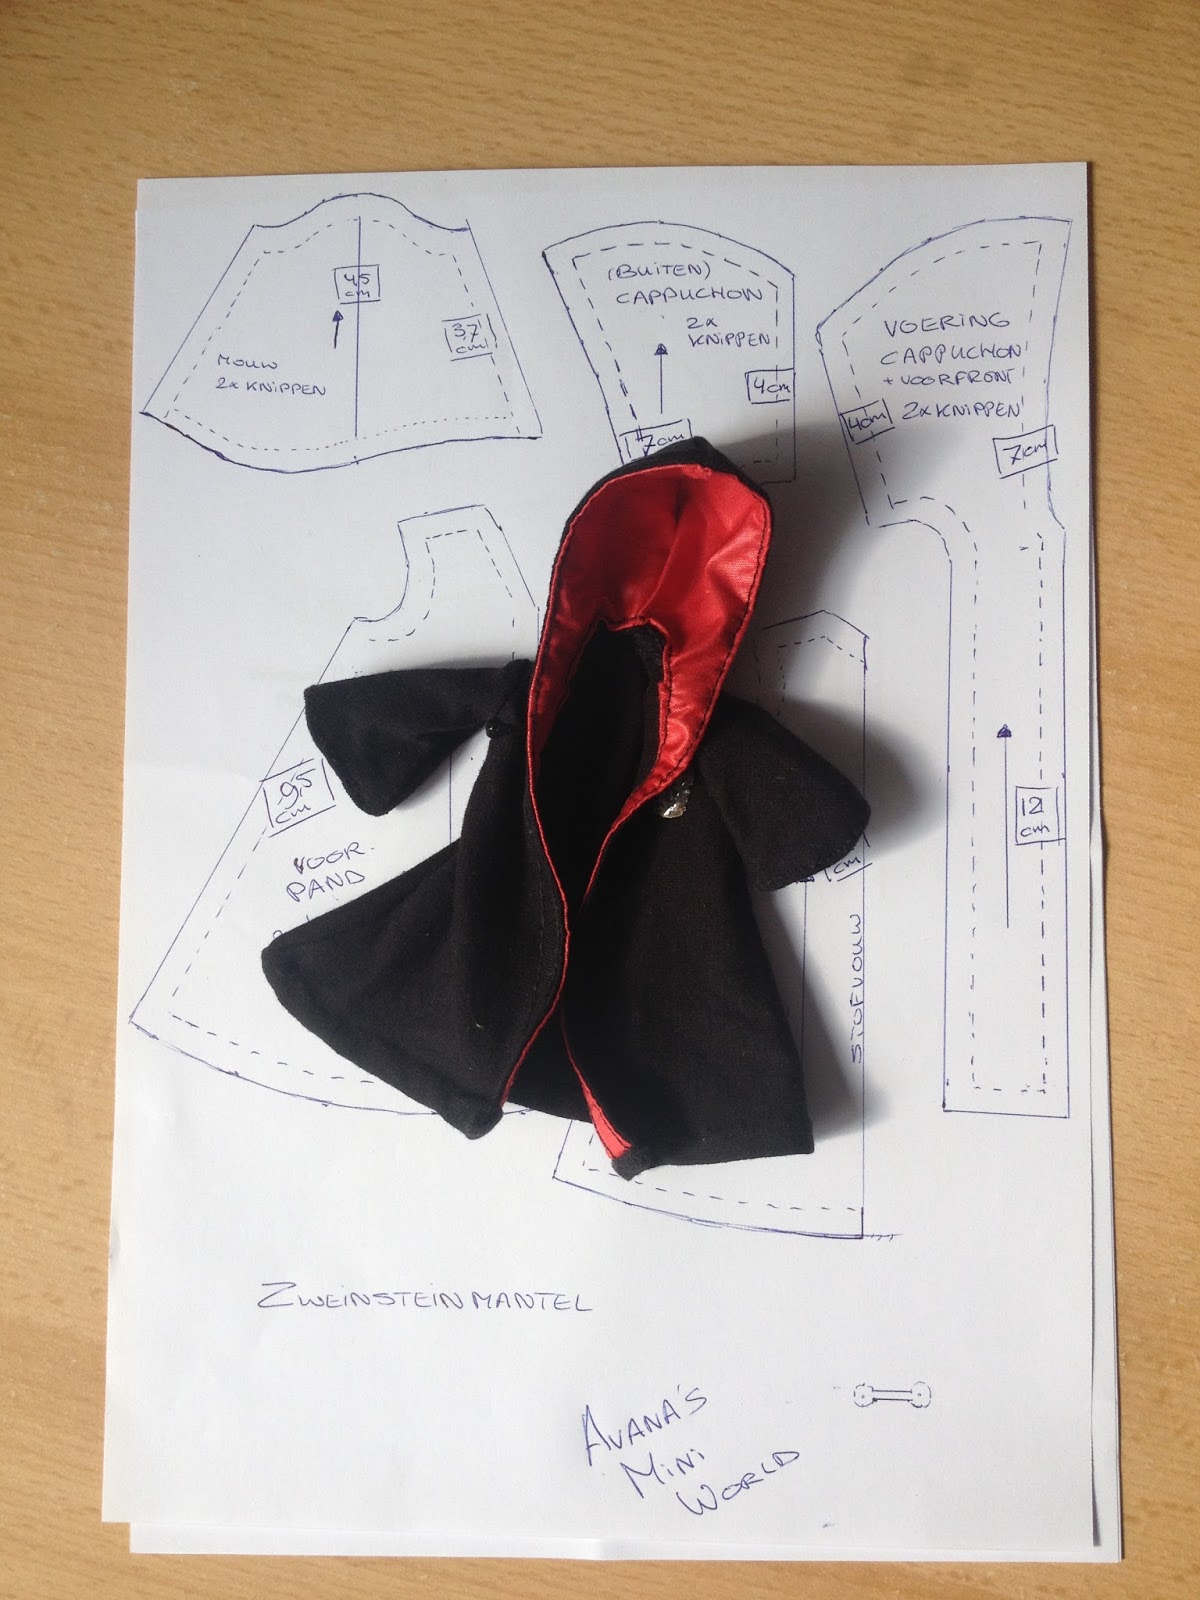
Een Griffoendor mantel / A Griffindor cloak


Hij is inmiddels al even af maar ik was er nog niet aan toe gekomen om er een blogje aan te wijden; Harry's mantel.

I finished it a while ago, but haven't made time to post a blog about it; Harry's cloak.


Voor het patroon heb ik gekeken naar verschillende 1:1 patronen, dingen gecombineerd, verkleind naar 1:12 en er tenslotte nog allerlei veranderingen aan gedaan tot ik tevreden was :)

For the pattern I looked at different 1:1 patterns, combined some things, resized it to 1:12 and last but not least I made all kinds of changes until I was satisfied :)


Het was lang geleden dat ik iets genaaid had, maar het is net als fietsen, je verleert het niet echt, het duurt alleen even voor de kennis weer terug is :)

It had been a long time ago since I did some sewing but it's just like riding a bicycle, no one forgets how it's done but it might take a while before you remember it all :)


De capuchon vond ik veel te klein uitvallen. I thought the hood was way too small.


Ook Harry was tevreden met deze ruimere capuchon.

Harry was satisfied with this hood also.


Uitvogelen hoe ik de contrasterende voeringstof moest vastmaken, was wat lastiger. Maar uiteindelijk lukte dat ook.

Figuring out how to attach the lining was a bit challenging, but in the end I managed.


Harry begon het passen uiteindelijk beu te raken. "Je bent nog erger dan madame Mallekin," riep hij. Zijn haar zat nog wilder als gewoonlijk en zijn bril mocht hij uit voorzorg niet op van me.

Finally Harry started to get annoyed. "You're even worse than madam Malkin," he cried out. His mop of hair was even more untidy than ever, and I would let him put on his glasses out of precaution.


Een close-up van de sluiting; een reepje zwart leer en twee zwart geverfde plakkraaltjes.

A close-up of the clasp; a small strip of black leather and two beads I painted black.


Tenslotte heb ik het Griffoendor wapen bevestigt, et voila ... het eerste mini kledingstuk is een feit ;)

Finally I attached the Gryffindor shield, et voila ... the first miniature piece of clothing is a fact ;)


Harry begon onmiddellijk  door de gangen van Zweinstein rond te struinen met zijn Sluipwegwijzer.

Harry immediately started wandering around the corridors of Hogwarts with his Marauder's Map.