I've finally finished the inner doors for the Hogsmeade (Scottish) cottage! :)
Not perfect by all mean, but after all the struggles they gave me, I'm more than happy with the result ^^
Once they were finished I couldn't resist putting all the walls together with lots of masking tape. Not only for fun, but also to give me a better understanding what I need to do next. It also gave me a boost for the next part.
Of course doing some home decorating was purely for my pleasure, though I hope you enjoy the photo's as well ;)
Not everything inside will eventually end up in the cottage but most of it will.
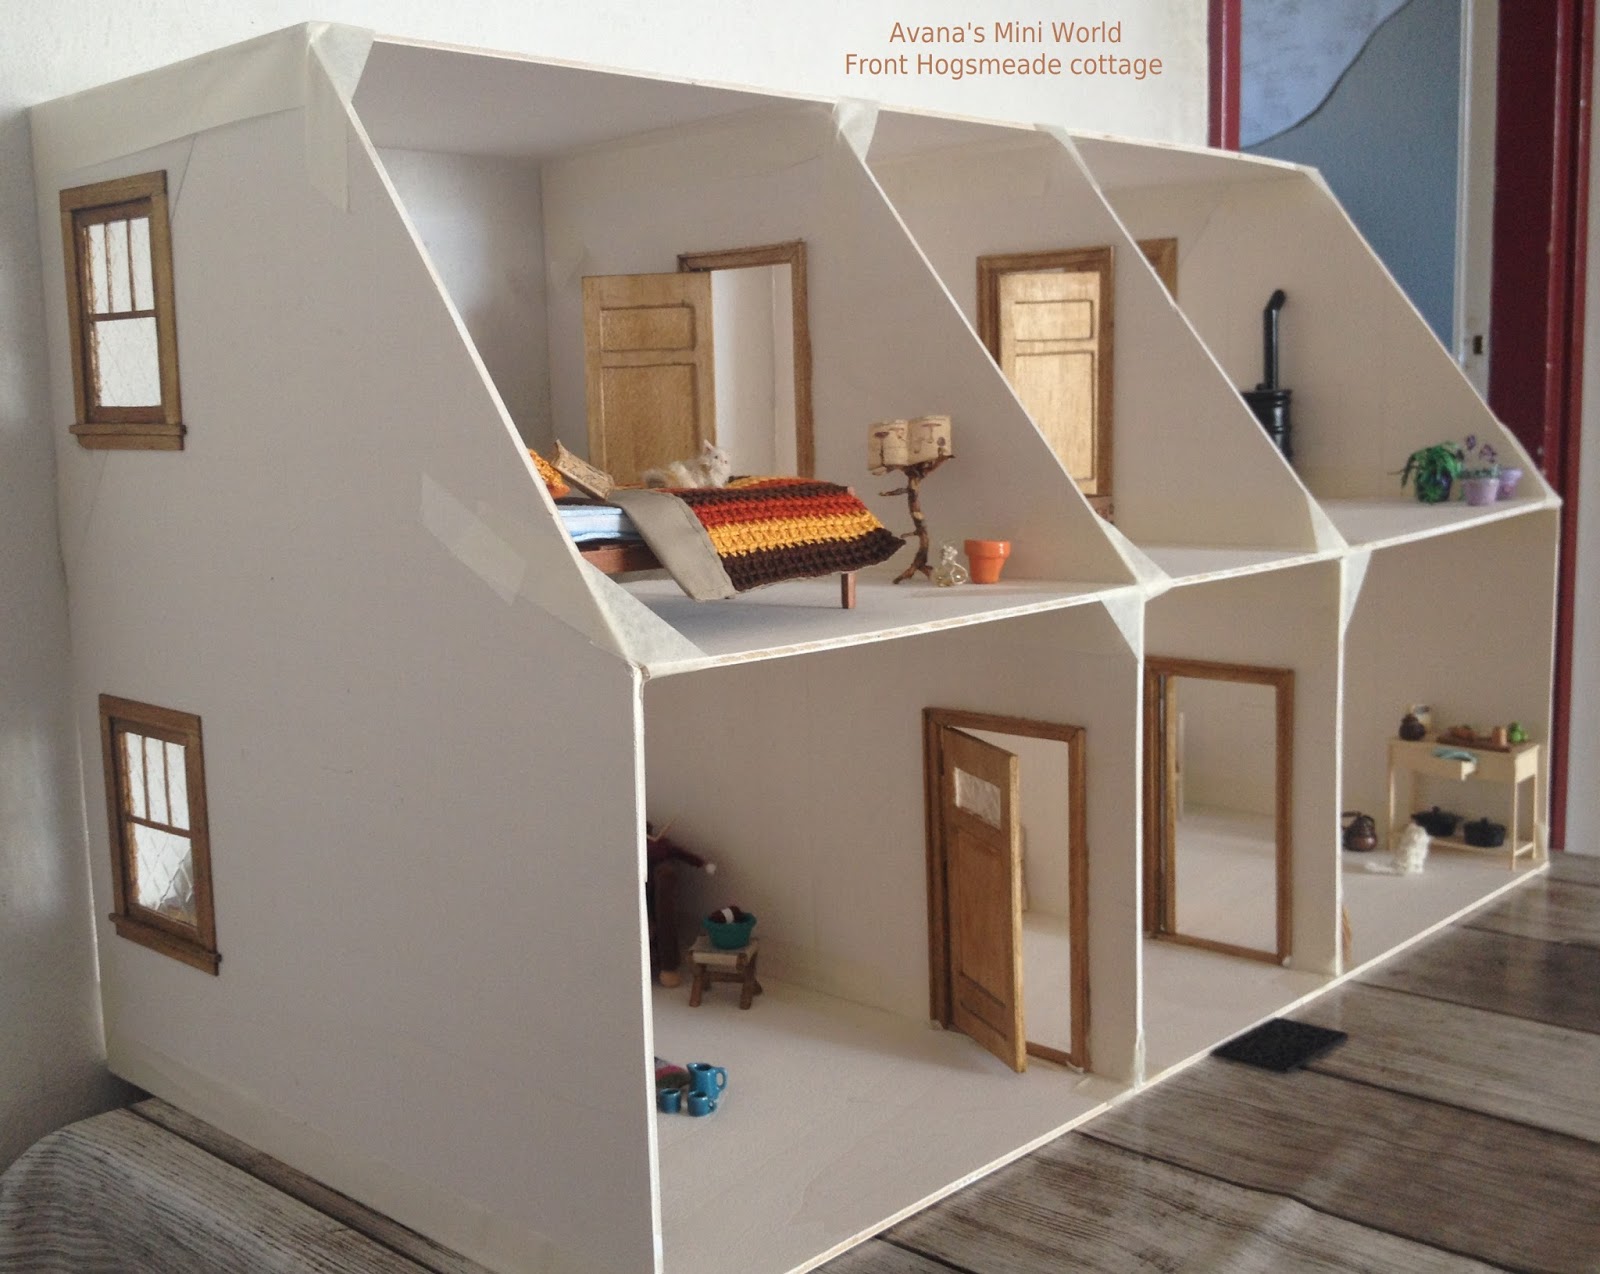
Most miniatures are made by me, some be others. Such as the Kneazle (cat) and the tree-like bookstand, made by Bibbidi Bobbidi Boo, and the books on the bed and the bookstand are by Marike's Magical Miniatures.
The furniture won't stay in the cottage, but I haven't made any for the living room :)
The stairs still need some work, so this is a good opportunity to have a good look.
Pixie is by Georgia Marfels, Parcels by Bibbidi Bobbidi Boo.
The least idea's yet for the bathroom, other then the colour, lilac/lavender :)
Apple pie cutting board and Kneazle (cat) made by Bibbidi Bobbidi Boo.
Showing posts with label attic landing. Show all posts
Sunday, February 18, 2018
Tuesday, January 16, 2018
Doors for the Hogsmeade Cottage, part 3
It has been a while since I worked on building the Hogsmeade cottage. I've done lots of other things, and also spend time with making miniatures for my Etsy show. And of course then it was time to start crafting Christmas miniature :)
I'd promised myself during that time that January would be the month to continue building my cottage. So, with all Christmas decorations, big and small, put away again, and all the wooden walls and parts of the cottage waiting for me on my large dining table, it was time ^^
The hardest part now, was to figure out where to start :') I knew I was struggling with the doors but I was not sure if I'd found a solution already. It'd been four months and I'd changed the plans so many times already. And on top of that, I have a terrible memory (a)
I decided to reread the previous blogs about the cottage to jog my memory.
For those who are interested, here you'll find the first blog and the background story for the cottage: A new project!
Before continuing with the door and those evil hinges I made the other door frames/jambs. I glued them in the openings, sanded them and stained them.
(you can find a link to the original tutorial for jambs here)
I showed you in August about the small slat of Balsa I'd use to fit the door. I still rather use that method instead of carving the openings for the hinges in the door, and probably ruin it :')
After checking it multiple times (a) I glued that slat to the door and sanded it.
Now I'm going to stain the door and then glue the hinges and nails to the door. Keeping my fingers crossed in the mean time ;)
The doors for the entrance hall will have little windows.
Labels:
attic landing,
bathroom,
doors,
Harry Potter,
Hogsmeade house,
How to
Friday, April 28, 2017
Update on Hogsmeade house
It's long overdue, but I finally have figured out how to solve the different problems that kept popping up :) Or that's what I hope.
I
figured that I could better change plans now, before the walls would be
glued together. In the end it will be just a little bump along the road,
right?First there was the problem with the stairs.
Having solved that, I discovered that the doors on the attic landing would be very small and a bit too low, though that could probably work since it's a cottage, right? ;)
Also I thought it might be very hard to fit two beds in the room, with that roof above.
| It's exciting to see it in 3D once in a while (after 2 days the masking tape will come loose). |
I'd had to buy new wood, saw/cut new walls, and of course, made new plan drawings (a)
When I finally found the time and courage to work out this new idea, I came across a next challenge. One a more expierenced builder could have easily managed, but seemed too big for me :')
I'd forgotten the fact that a dolls' house is supposed to get open once in a while, and while I'd figured out how to do that in the first plan, I got stuck everytime I tried to figure it out with this latest idea :(
So, two days ago, I spend hours on the internet searching for other solutions. Got a new idea (a), made new plan drawings, and brainstormed with my friend Kim about it. She is my go to girl for all cottage related issues after all ^^
The idea is something like the picture below though my house will be twice as deep as this one.
The gable end (side) of the house would be;
![]() |
| Blue lines instead of red |
So having finally figured out what to do, I woke up yesterday at 4 am, too exited to start to stay in bed :) I drew and measured, cut and glued, and when it was noon I was ready to get the masking tape (again ^^) and put it all together.
Tadaa!
The bedroom will still be small for two single beds but after all the cottage is supposed to represent the one I describe in my story; a tiny house in Hogsmeade they rent just for the summer holidays untill Penny will go to Hogwarts on September 1st, and maybe mother Bianca, as the new professor, as well. So, they'll just have to make do ;)
I'm thinking of keeping the beds on either side of the fireplace though. That way I can put the door in the middle of the wall, right across the fire place and have place on both sides of the wall for cupboards or cabinets. Maybe even trunks by the end of the beds ^^
The stairs are now placed on the other side, and against the back wall. Being able to see the stairs is a plus, but it also gives more room on both levels.
Labels:
attic landing,
bathroom,
bedroom,
entrance hall,
Harry Potter,
Hogsmeade house,
kitchen,
living room,
stairs,
windows
Subscribe to:
Posts (Atom)


