Showing posts with label bedroom. Show all posts

Tuesday, May 25, 2021

Hogsmeade cottage - the bedroom part 2 & Crafting together (May)


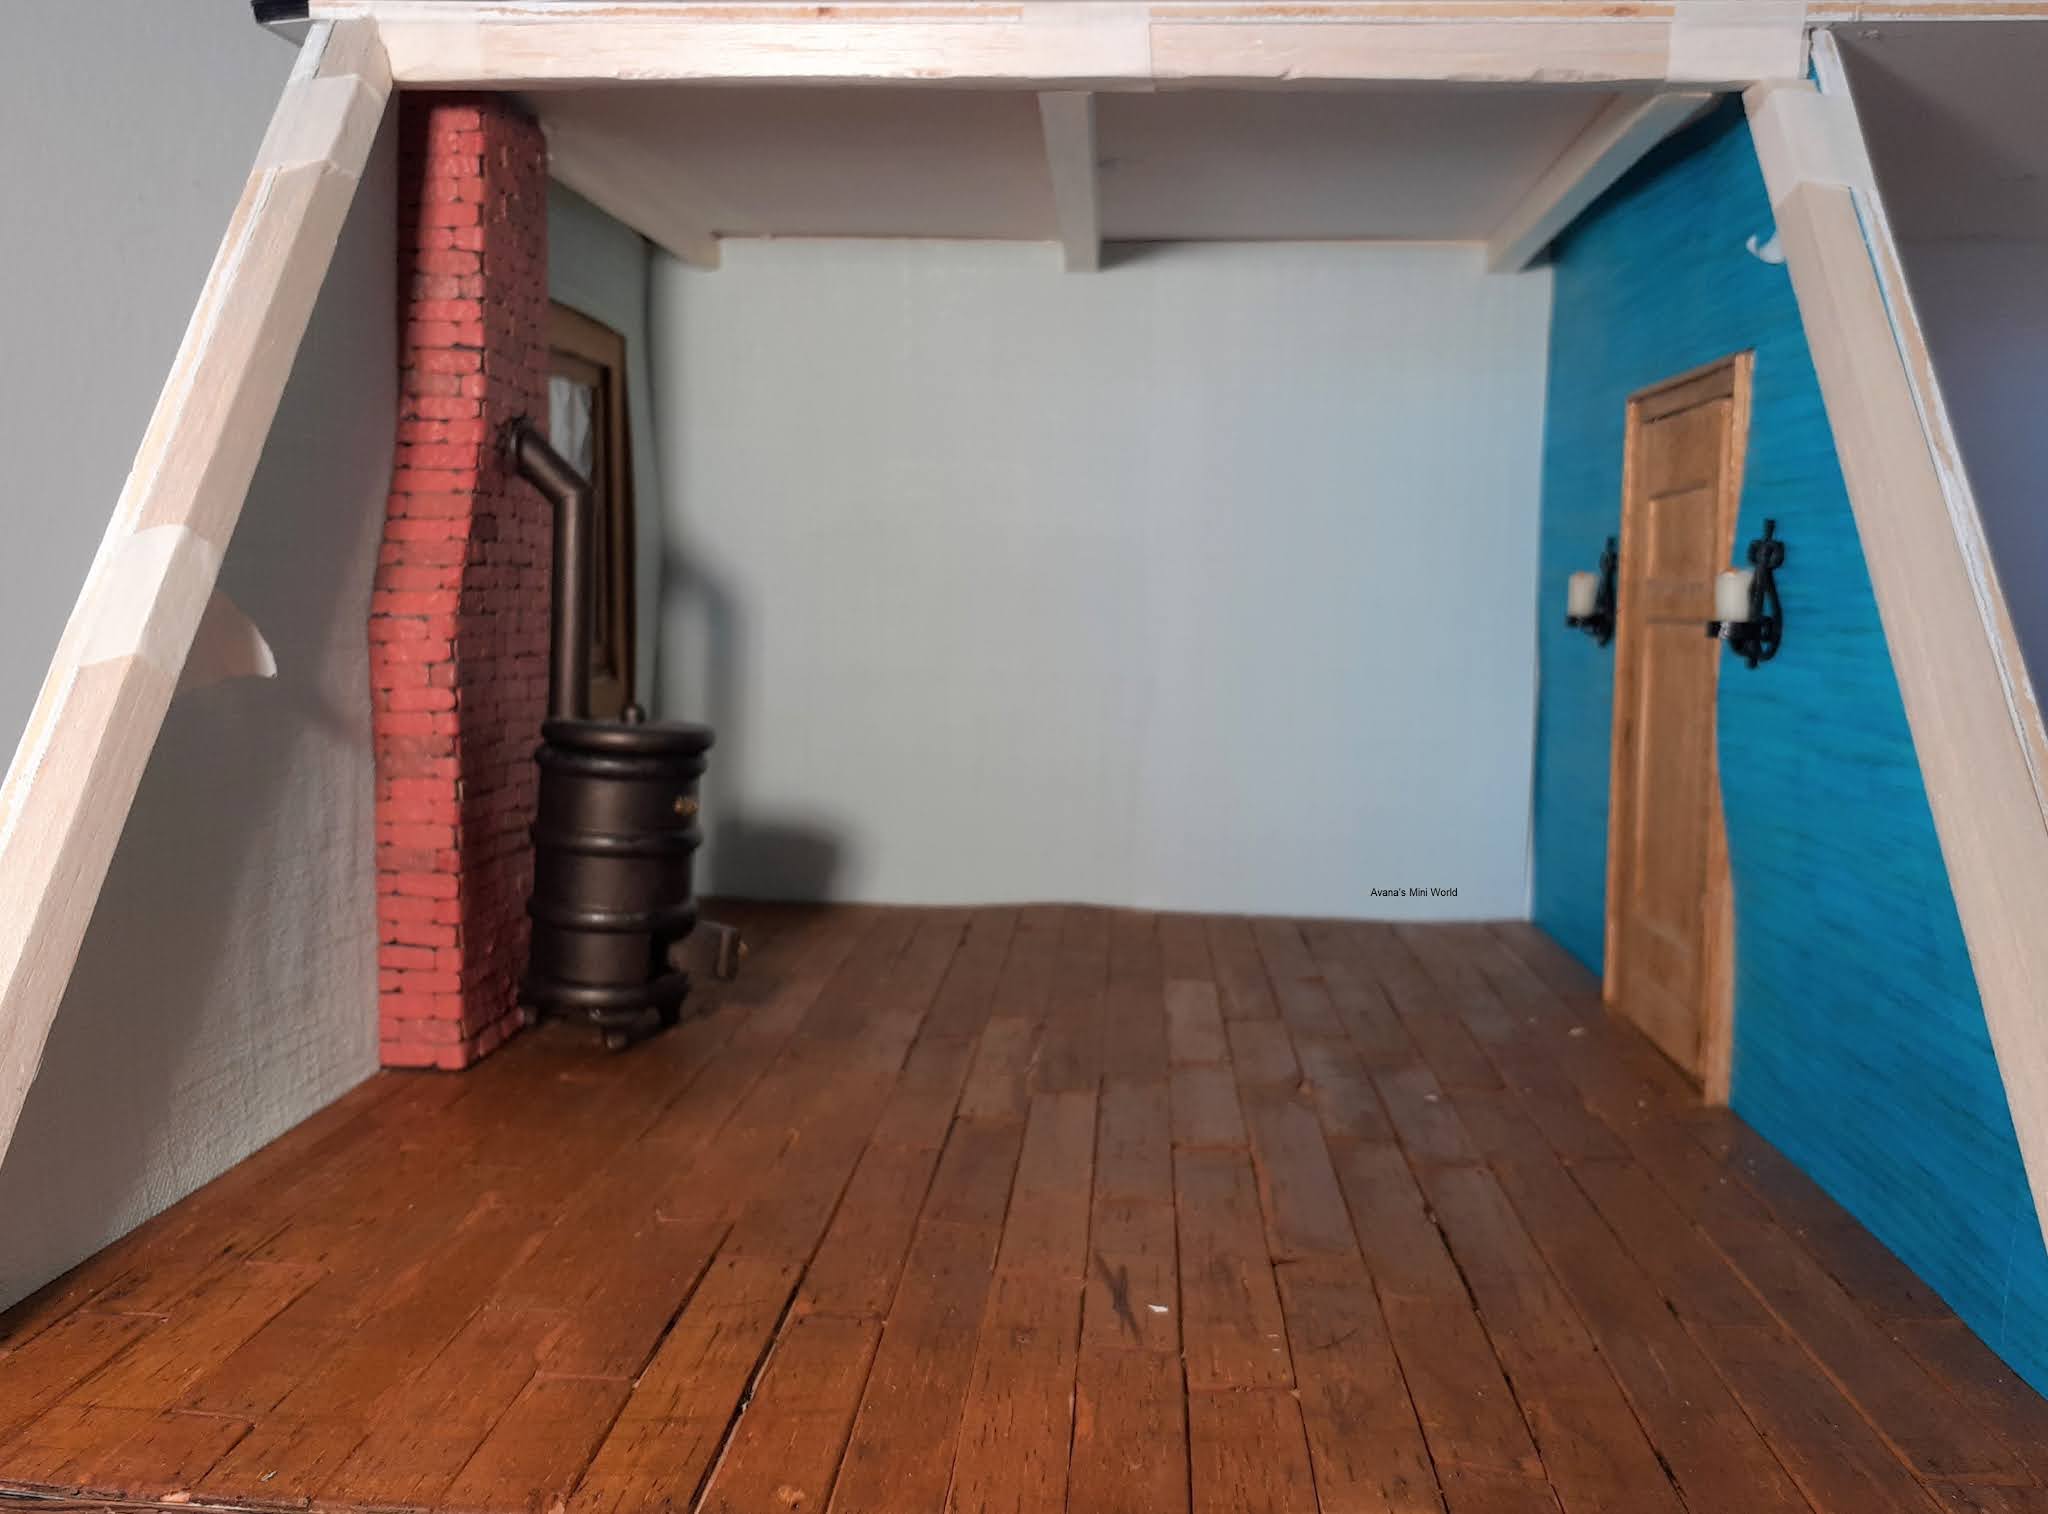
After I had made the candle wall sconces and finished the walls, floor and ceiling it was time to make the curtains.
This time I wanted the curtain rod to slip through eye hooks on the wall. I embellished the hooks with wooden beads to get a little more clearance between the wall and the finials on the rod.
The rod is a wooden screwer I sanded until it would fit the smaller eye hooks and then I painted it with gold acrylic paint.

It should have been easy to twist the eye hooks in the wall and slide the rod (with only one finial) through the eyehooks. Then add the curtain in the middle and then put a finial on the other side.
Unfortunately the chimney-piece prevented that so I started by marking where the eye hooks would go, twisted only one in the wall and then finished everything else.


Two weeks ago Jolinda, Connie and I spend an afternoon crafting together. It was the first time in a while due to corona that it was the three of us and it very enjoyable :)
Connie worked on the sidewalk for the front of her shops and Jolinda made beautiful peonies.
I started making the curtains untill I got frustrated with them (a) and then got the oak stain out for the rocking chair and the dressing table with the mirror :)


Later that week I finished the curtains. I like the look ...


... but despite measuring more than once they still turned out to short, so I'll make new ones later :')
Penny doesn't care, she's happy with the new rocking chair :)


I also made time to give the shiny new door handles (on the left) a more aged bronze look.


And while I was at it, I also did the (Alladin) oil lamp and Bianca's high heels. Kept the inside and the soles of the shoes black.


Because I find it very difficult to take good photos from the back of the room, I made a little video :)
You can see the wash jug and bowl set (bought in England), the shawl (I made a few years ago) and the corset (gift from Kim) I've found back last week when I was organising my craftroom ^^. 
Furthermore the high heels near the bed, the chalk bord I want to fix for Penny and the door handles. Very happy with the progress ^^

I've also finally connected all the lights in the bedroom. The ledstrips behind the beams appear brighter in the video than they are though. 


Credits:
Inspiration for the eye hook with bead combination came from TinyFixation.
And the idea of the sewn on rings curtains (which I also used for the living room) is from Kendra's Minis.

Friday, May 7, 2021

Penny's pinboard

When I came across this tutorial by Julie Warren for a pinboard, it seemed like a great addition for Penny's side of the bedroom.
She was born in 1988 in a Muggle town and grew up there. Which is why there are posters and pictures of movies she's seen, of the Spice Girls (she likes Mel 'Sporty Spice' C the best) and Take That (secretly she had a crush on Mark Owen).

Now, at ten years old, she and her mum have moved to the cottage in Hogsmeade and she finally gets to discover the Wizarding World. Now the Weird Sisters, the Holyhead Harpies and dragons are all she can talk about and she saves every magical candy wrapper, a Hogwarts Express ticket, as well as one from the Knight Bus. 


I didn't have a sheet of thin cork, so I used a few of these stickers.

I used Balsa 3 mm strips for the frame and only varnished it. 

Penny has pinned all her favourite pictures and
is now deciding where to hang the posters.


Sunday, April 25, 2021

Hogsmeade cottage - the bedroom part 1

After having finished the roof with the gabled dormers, I treated myself on some kits from 't Tafereeltje. A reward as well as a motivation for the bedroom ;)
I was very happy to have found the candle wall sconces I liked for the bedroom. Love the rocking chair and the dressing table with the mirror. I've also bought door handles, so I can finally finished the doors after four years (a) Furthermore black stiletto's for Bianca and some cleaning supplies for the cupboard under the stairs. 


I assembled the wand lights after I drilled holes for the wires.
.

I sanded and painted them. 


Then I coated them with acrylic varnish (gloss).


I needed extra light bulbs for the candles, and couldn't resist to buy
some bonbons as well. They are white resin paint-them-yourself
bonbons. I've also bought a small bottle for glue or paint. And as a
surprise I got an extra resin object; Alladin's lamp. But those
bonbons .... omg I can hardly see them :') 


I made candles around the wires just underneath the little light bulbs,
baked them and then put the wires through the hole in the cups.


I punctured two little holes on either side of the door opening and
threaded the wires through after I have put some black nail polish
on the wire just under the sconces so you won't see any white.


I wallpapered the next wall, using a soft light mint coloured
wallpaper, a left over piece from my sister's bedroom ^^ 


I spend quite some time deliberating how to place the beams.
This way I can hide two ledstrips in the 'gap' between
the beams and the side walls at the back.


The beams all have been cutted, carved, sanded and stained


While working on the ceiling (inlay), I found out I made a mistake,
and had to make, craft, sand and stain a new beam :')


I've changed the layout of the room. Penny's bed is now at the 
front,  with room next to the fireplace for her dollshouse or a
desk or other play things. With the beds on the other wall you
could hardly see the potbelly stove and the window. 


I've beewaxed the wooden floor and put in the window sill. Next will be making the curtains and attaching the door handle. But for now I'm taking a little break to work a bit on my story :')

Monday, January 18, 2021

A crochet rug for the bedroom

Last week I happen to see some 'mug rug coasters' on Pinterest last week. Some done with macrame, some were crocheted. I like the look of them and thought it might be nice idea for the cottage bedroom.

So I put together three balls of yarn and looked for a new crochet stitch that would be fun to learn. My choice: the Elizabeth Stitch (also called the mini bean stitch). For a tutorial click: here.
I liked learning this stitch, it's easy to do (though it would be easier with a single thread instead of three ^^) and I like the criss cross look of it. 


Although I really liked the colours and the end result, I thought it was just a bit too coarse (I think) for a 1:12 scale rug, so I started another one with Venne cotton 34/2. Was worried a bit that it would be too thin, compared to the first one, at the start.


But it turned out to be perfect for a rug :)


Adding fringes or not, is the question. I wanted to do them with the turquoise Venne, but now I'm not so sure anymore. I might just leave it like this :')


Tuesday, March 17, 2020

A dolls' house for Penny

In the previous blog I promised to show you an update on the bedroom next, but I just finished a little something today that I want to show you first.

It was actually meant for the bedroom but it turned out a bit bigger than I thought it would for an 1:144 scale miniature.

Yes, that's right, 1:144 scale! A dolls' house for a dolls' house ;) I've always wanted to make one, just for the challenge, and because it would be great for the little girl living in the cottage. I just forgot she needs to share the only bedroom with her mum, so there might not be enough room with two beds and the other furniture (a)

There are a lot of amazing tutorials on Youtube for 1:144 scale dolls' houses. The one I followed is this one from The Square to Spare, so I'll just show you some of the (many :P) photo's I took.

Instead of popsicle sticks and coffee stirrers I used
Balsa wood.

And I cut out all the windows and
doors before I glued the walls together.

Once I'd finished the porch, the railings
  and the dormer I let Penny have a look.
She was very pleased ;) 

After I'd painted the front and interior with white
acrylic paint I made the clapboard sinding.

The floor were painted as well, with a
watered down brown acrylic.

I was so happily working on all the little details that I totally forgot to take photo's untill it was done :')

I've chosen a vanilla yellow colour.

Penny is admiring her dolls' house.

It's certainly bigger than I expected
from a 1:144 scale house :')


The teddybear was made by Monique, and the Weasley-
style rug was made for a swap by Nine.

Thursday, September 21, 2017

How to make an Hogwarts steamer trunk part 3

 (for part 2: here)

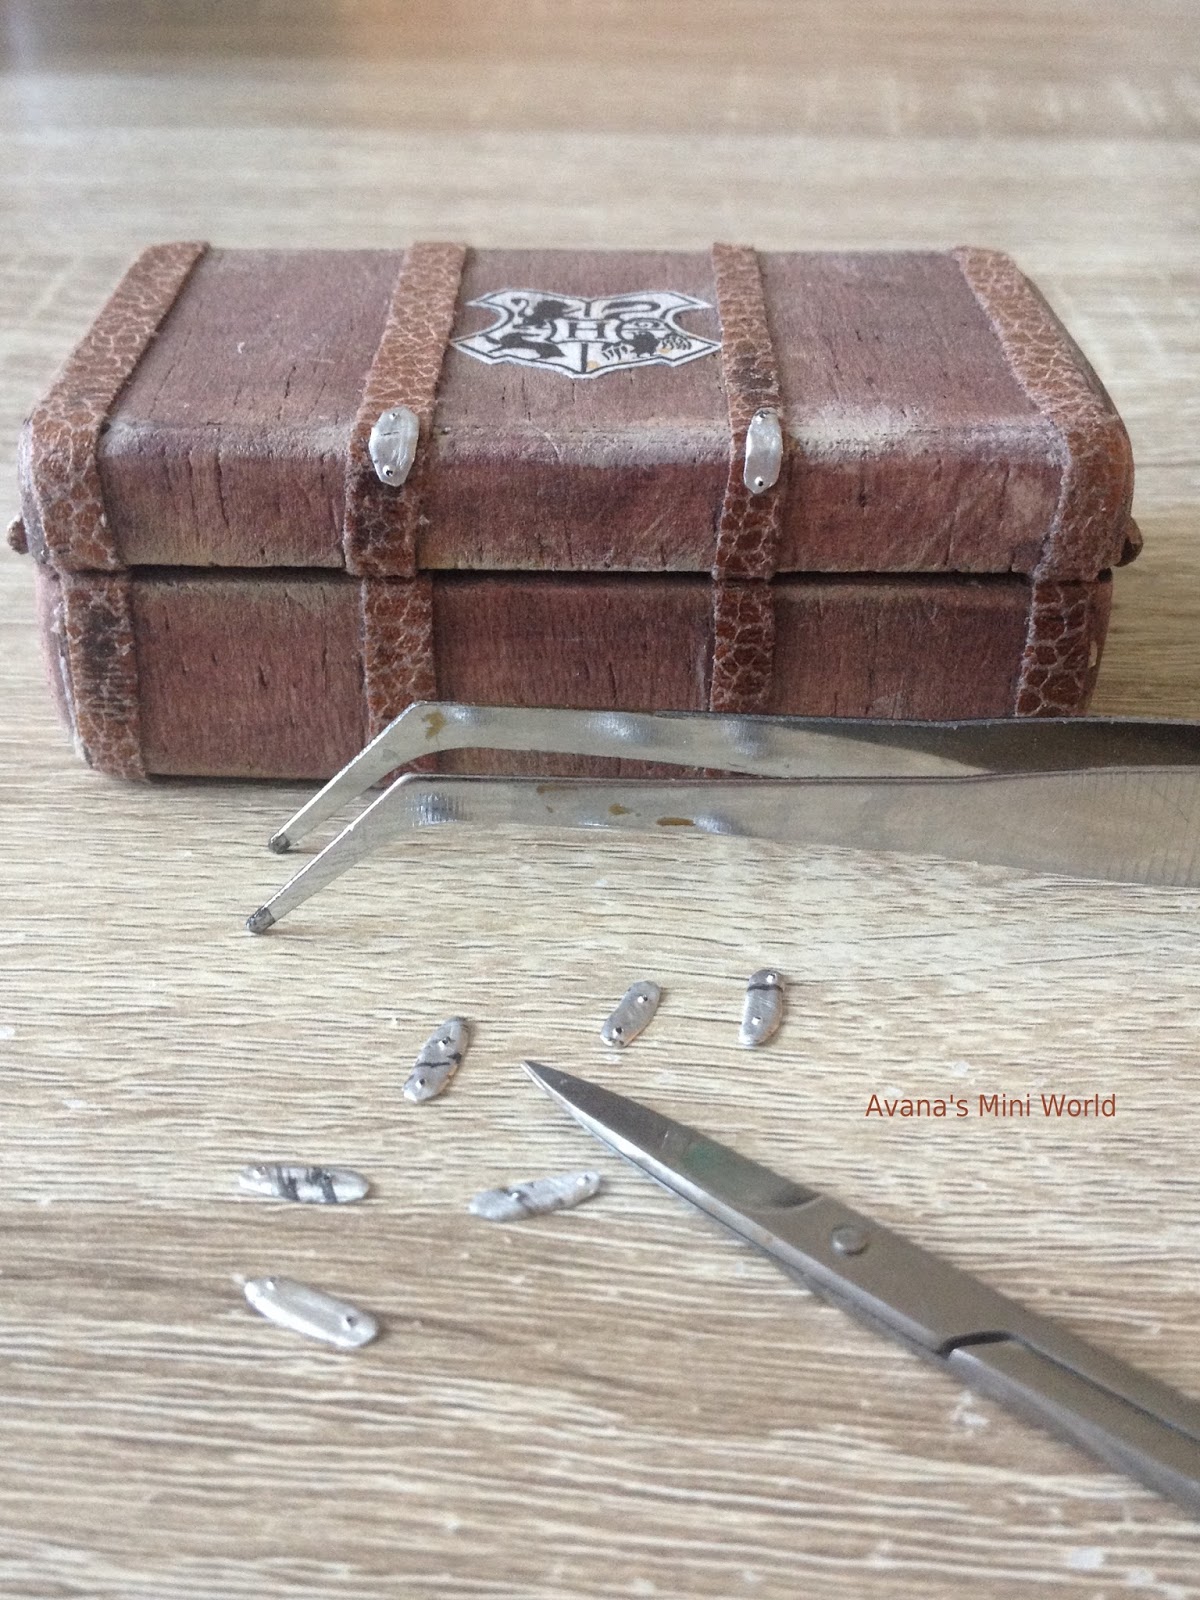
The metal looking details for the trunk were the most time-consuming part of the process. Especially glueing them :') I started with Tacky glue but that didn't work well enough, so in the end I used Super glue.


I made them from aluminum small and large tea light cups. Could have just drawn and cut them but for the first parts I used brass embossing stencils I had.


I cut them, made same tiny holes at both ends by piercing them and glued them. Super glue was needed ;)


Four on the front, four on the back and on to the next parts.


I forgot to show before, but this is how I tried to make them look less shiny and new. First I sanded the aluminum, I added a bit of black nail polish and then dabbed it with a paper towel before it dried completely. If there's still too much black, you could use some sand paper as well.


For the corner parts I drew the shape with a pencil on the aluminum and cut it with sharp siccors. Repeated that multiple times before I had a shape that fitted the corned and looked half way decent (a)


After a cut the parts for the eight corners. A bit too much black so I sanded them a bit. 


I punctured then on all three corners (with the silver side up), and made the holes for the side of the trunk a little bigger.


I've forgotten to take photo's when I made the longer metal strips but the process is the same.


The only thing missing are the locks but for those I'll look in Rijswijk at the fair next month :)


All in all, I'm very happy with the way it turned out. And though I normally need a tutorial or something to get started and make my own version of something, it was once trying to work this out on my own with only the movie stills for inspiration.

I hope you like following the process and if you want to know something about that, don't hesitate to contact me, here or on my Facebook page :)