Showing posts with label living room. Show all posts

Wednesday, February 10, 2021

Update on the living room rug

After crocheting for a couple of weeks, I felt like doing some other needlework. So, after a long time I picked up working on the living room rug. 
After all, the bedroom rug already has one :')

I haven't done a blog about this rug since April 2019 😮 This is how much I'd done back then;

April 5th 2019

Apparently I did make some progress since then, because this is how it looks at the moment:


The finished rug will have a total of 54 (6 x 9) octagons.


Sunday, March 29, 2020

Finished the Queen Anne wing chair for the living room

I hope you are doing well and stay safe in these dificult times 💜

Though I haven't been able to many miniatures, I've finally finished the Queen Anne style upholstered wingback chair for the living room.


I'd showed you some w.i.p. photo's before, from what I had done in November;


Eventhough I didn't have a kit, the
 photo instructions from 1inchminisfromkris 
were very helpful! You really should visit her
blog if you've never done before :)

Working on the front arm covers.

First time I made piping instead of
using cord. So much easier than I
thought it'd be, and I love the result!

I've made a depression in the cushion
to give it a 'sat in' look.

I've cut 3 mm of the legs I'd bought
before they were oak stained.

Credits:
Flowers by Kim Donovan
Knitted rug by Nine Vogel

~O~

Take care of yourself!
Stay home
Stay safe
Safe lifes

💜

Sunday, March 15, 2020

Cottage living room update

I knew I was behind with things but I hadn't realized how much :')
Apperently I'd started writing an update on the cottage in January but never finished that.
So without further ado, this is the progress on the cottage living room from January, mainly pictures ^^

I'd started making a comfy wing back chair back in December before we started working on Christmas miniatures. Once of these days I'll finish it (a)


I made new curtains because the first set I made was 1 cm too short.


I've put the glass stained deer from 'Glaskunst in Miniaturen' and the cute snapdragon Kim (Bibbidi Bobbidi Boo) made me, on display. Doesn't it look cosy? :)


The rod of the wall hanger Jolinda had made me, was made a bit darker to match the living room.


I made a bellows with this tutorial, using cartboard, thin leather and a metal bit I cut from jewelry.


I used the veneer slats from Bibian Angelique Miltkau for skirting boards.


I still had planned to do more furniture for the living room, but I had started to wonder if it wouldn't be too crammeded with more cabinets, a desk and chairs. So I decorated the room with the things I already had and quite liked it already :)


So, I've decided to keep it this way and only add the little decorative and personal items later on. I really like how it has turned out so far! Even though it's not as Weasley boho chic as I imagined at the start. But then, Bianca isn't Molly Weasley, is she? ;)


Next, an update on the bedroom, which I've started working on in February (a)

Thursday, November 7, 2019

Update on the cottage (at last)

I haven't been able to write any blogs the previous month, because I was preparing for NaNoWriMo. It started last week, so no crafting untill December, only writing ;)
The Hogsmeade cottage is still on my mind though, since it appeared in my story long before I began making miniatures. So a lot of new scenes about Bianca and Penny (amongst other things) will be written this month.
I'd reached the daily goal of 10.000 words early yesterday, so I decided to write one or more of the blogs that were overdue ;)

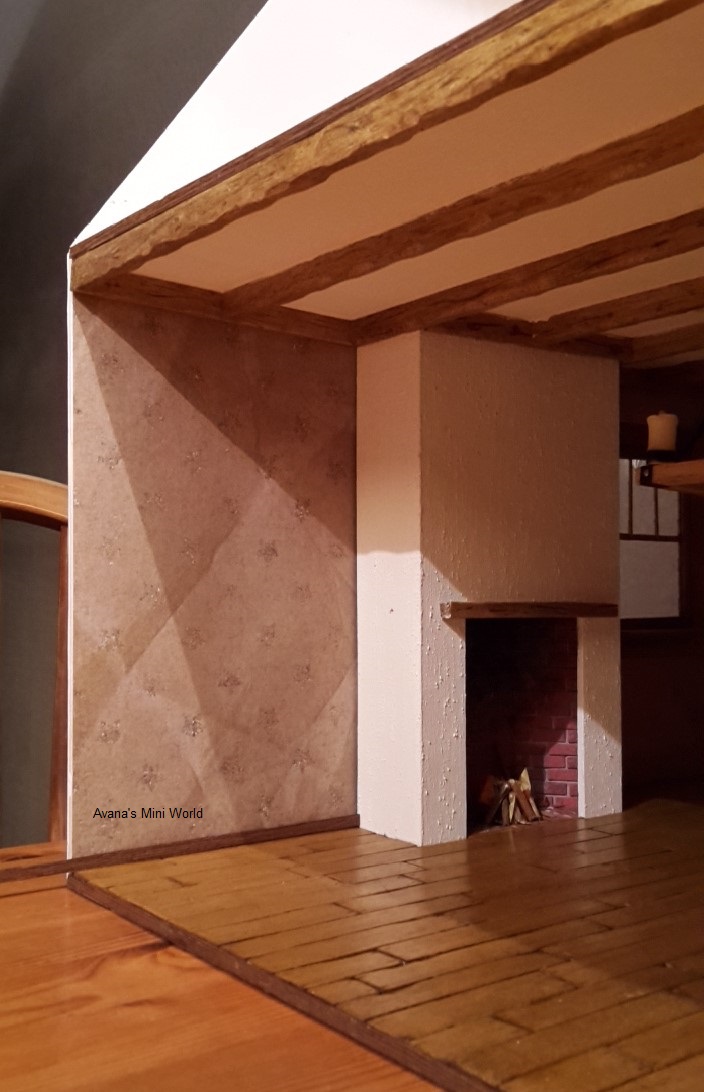
I'll start with a couple of things I've done in the living room since the last update.
One of the things I should have done before placing the fire place was making curtains for the little window at the back.
Knowing it would be a tiresome job was probably why it took me awhile to continue with the living room in the first place ;)

While looking for a good way to make the curtains, I found this tutorial for curtains with sewn on rings by Kendra's Minis. It just seemed a match for Bianca's home :)
So I started by making the curtain rod from two beads and a skewer. And for the brackets I used small spiral parts of a laser cut wooden ornament.


I painted the skewer black, and used bronze patina on the other parts. Of course I only glued one bead to the rod, because I still had to make the curtains ;)


Attachting the curtain rod brackets to the wall was as difficult as I imagined :')
I had to remove the fire place and therefore the ceiling with the beams and the wooden floor.


But I persevered ;) The rod is - obviously - removable so I can hang the curtains at a later date.


Having to remove the ceiling and flooring also gave me the opportunity to add the mini LED light strip I'd purchased at the fair at the back of one of the beams. It took me quite some time but especially the added light at the back of the room was worth it.


I used the vener slats from Bibian Angelique Miltkau as skirting boards and to cover the front view of the floor and ceiling.


Then it was time for the curtains. I'd found some nice fabric and - following Kendra's tutorial - I only needed to decided what look I'd prefer for the cottage livingroom; with or without curtain tie back. I think it will be without :)


I couldn't take a good photo from the inside (window) but apart of a window sill it would look like this;


Unfortunately the rod brackets on the inside were placed a bit higher, so the curtains ended up being 1 cm too short.
So that'll be my next task for the living room.
But first - after this writing month - I'll finish the little autumn scene we've been working on with the mini club and then I probably want to do something for Christmas, so yeah ... next year, I guess ;)


Tuesday, May 21, 2019

A coffee table

After I'd finished the sofa, I needed to make a coffee table of course :)
I didn't use a tutorial but found inspiration from these images;


I needed to do something a bit out of my comfort zone, because I don't want only oak stained furniture in the cottage. This might seem hardly different but it was for me lol

For the legs I drew a template first. Cut the four legs from
Balsa. 4 mm if I remember correctly. Then I stacked them all
 up and sanded them together in the hope to get identical legs :)

The top is from Balsa 2,5 mm, but the legframe is from
cardboard, because I didn't want that to have wood grains.

The top got an oak stain coating and leg frame a layer
of Gesso (primer). For a little sturdiness I'd glued thin
Balsa strips on the inside of the cardboard.

With a layer of black acrylic paint, and a bit of
sanding some edges for aging.

I then drybrushed some gold paint
on the sanded edges and glued the
top onto the leg frame.

Time for the furniture removers, I guess ;)

Though Penny is already getting comfortable outside
the living room.

Just a glimpse of the living room because photo's are either 
too dark or too bright inside (a) Still a work in progress.

Saturday, May 18, 2019

A sofa for the cottage living room

It's been awhile, but I've finally managed to make some time for another blog.
I've made this sofa three weeks ago. It has taken me forever to find the right style, design and fabric. I kept doubting myself and changing my mind, so I was very happy when I'd made a choice ;)

I used this semi tutorial from Kitty and Kat Miniatures, but with a few twists of course.

I used Balsa 2,5 mm and 6 mm dowel (not a half dowel) for
the wood base. Mine is not as wide as the one from the tutorial.

Againt the advise I went with a stretchy fabric with an
abstract pattern :) I went through my fabric stash but couldn't
find something fitting for the living room, so I ended up
taking a shirt from my wardrobe. It had been my mothers
at one time, so now it'll be a sofa with memories ;)

I adapted the leg assembly with an extra
piece of Balsa to make it a bit more sturdy.

And gave it an oak stain finish.
It would almost make a nice
coffee table, right? :)

It took some time to figure out which part of the shirt
to use where on the sofa but I love how it turned out.

The back looks totally different, as do the sides, 

Tho photo is a bit too yellow from the candles but
I wanted to give a better look of the leg assembly :)

Moving the sofa around to see where it'll
fit best. Penny has made herself
comfortable already :)

Next piece of furniture will be the coffee table.

Sunday, January 27, 2019

A bookcase for the Hogsmeade cottage


In Oktober I'd started on the first piece of furniture for the living room; the bookcase from the first book of Julie Warren, and after a - very long - break I've finished it this weekend.
I'm so very happy with it; can't hardly believe I managed to do the drawers and glass doors ;)

I'd almost finished the base before birthdays
and the holidays and 1:1 painting got in the
way :)


I've used a light oak stain and I'm thinking about polishing it with the beeswax I've bought for the (mini) living room floor. Next: making lots and lots of books :)