Showing posts with label shop:Nalladris. Show all posts

Sunday, October 27, 2024

Fair in Hardinxveld-Giessendam - October 2024

Al tweeëneenhalf jaar niet naar een beurs geweest, al een jaar geen blog geschreven en ook weinig geknutseld afgezien van de maandelijkse middagen met Jolinda.
Maar gisteren samen met haar naar een (voor ons) nieuwe beurs in Hardinxveld-Giessendam geweest en daar weer heel veel inspiratie en miniaturen mee vandaan genomen ;)
Ik vond het een hele leuke, gezellige beurs, met veel bekende, maar (voor mij) ook nieuwe, gezichten en heel veel moois om te bekijken en je aan te verlekkeren.

Hieronder een kleine impressie:

I haven't been to a fair for two and a half years, haven't written a blog for over a year and haven't done much crafting too, apart from the monthly afternoons with Jolinda.
But yesterday I went with her to a new (for us) fair in Hardinxveld-Giessendam and took a lot of inspiration and miniatures home ;)
I thought it was a very nice, pleasant fair, with many familiar, but (for me) also new, faces and lots of beautiful things to look at and be tempted by.

Below a small impression:

Room 1

Room 1 as well

Workshop by Priegelmee

Beautiful scenes from Reneeltje.

Special tiles and wall plates by Jeanette Bode

Fantasy houses made by Poppen(T)huis

Lovely bird houses and bee hotels by Lijnie Krook

Het was heel gezellig en natuurlijk ben ik niet met lege handen weggegaan ;)

I had a great time and of course I didn't leave empty-handed ;)

My precious ;)

 3D potion bottles, jars and a fantastic door knocker
with a dragon's head by Wendy's Mini Art 

Lion head wall fountain, frying pan and whisk, 
bouquet of roses and little snowmen from Minidoor.

To decorate Santa's workshop.

Wall planters for my Italian project, a necklace for Bianca, the witch,
 and a little leaf punch from 't Muizenholletje (I think).

Christmas cut out boxes and (purple) flower kits by Priegelmee.

Room plaques for the Hogsmeade cottage from Jeanette Bode

A bee hotel for my Italian project by Lijnie Krook.

DIY kits from Nalladris. A gingerbread 
men mal and a door bell.


Over anderhalve week gaan Jolinda en ik weer samen knutselen en ik heb genoeg om mee aan de slag te gaan ;)

In a week and a half Jolinda and I will be going to craft together again and I have enough to choose from ;)


Sunday, April 25, 2021

Hogsmeade cottage - the bedroom part 1

After having finished the roof with the gabled dormers, I treated myself on some kits from 't Tafereeltje. A reward as well as a motivation for the bedroom ;)
I was very happy to have found the candle wall sconces I liked for the bedroom. Love the rocking chair and the dressing table with the mirror. I've also bought door handles, so I can finally finished the doors after four years (a) Furthermore black stiletto's for Bianca and some cleaning supplies for the cupboard under the stairs. 


I assembled the wand lights after I drilled holes for the wires.
.

I sanded and painted them. 


Then I coated them with acrylic varnish (gloss).


I needed extra light bulbs for the candles, and couldn't resist to buy
some bonbons as well. They are white resin paint-them-yourself
bonbons. I've also bought a small bottle for glue or paint. And as a
surprise I got an extra resin object; Alladin's lamp. But those
bonbons .... omg I can hardly see them :') 


I made candles around the wires just underneath the little light bulbs,
baked them and then put the wires through the hole in the cups.


I punctured two little holes on either side of the door opening and
threaded the wires through after I have put some black nail polish
on the wire just under the sconces so you won't see any white.


I wallpapered the next wall, using a soft light mint coloured
wallpaper, a left over piece from my sister's bedroom ^^ 


I spend quite some time deliberating how to place the beams.
This way I can hide two ledstrips in the 'gap' between
the beams and the side walls at the back.


The beams all have been cutted, carved, sanded and stained


While working on the ceiling (inlay), I found out I made a mistake,
and had to make, craft, sand and stain a new beam :')


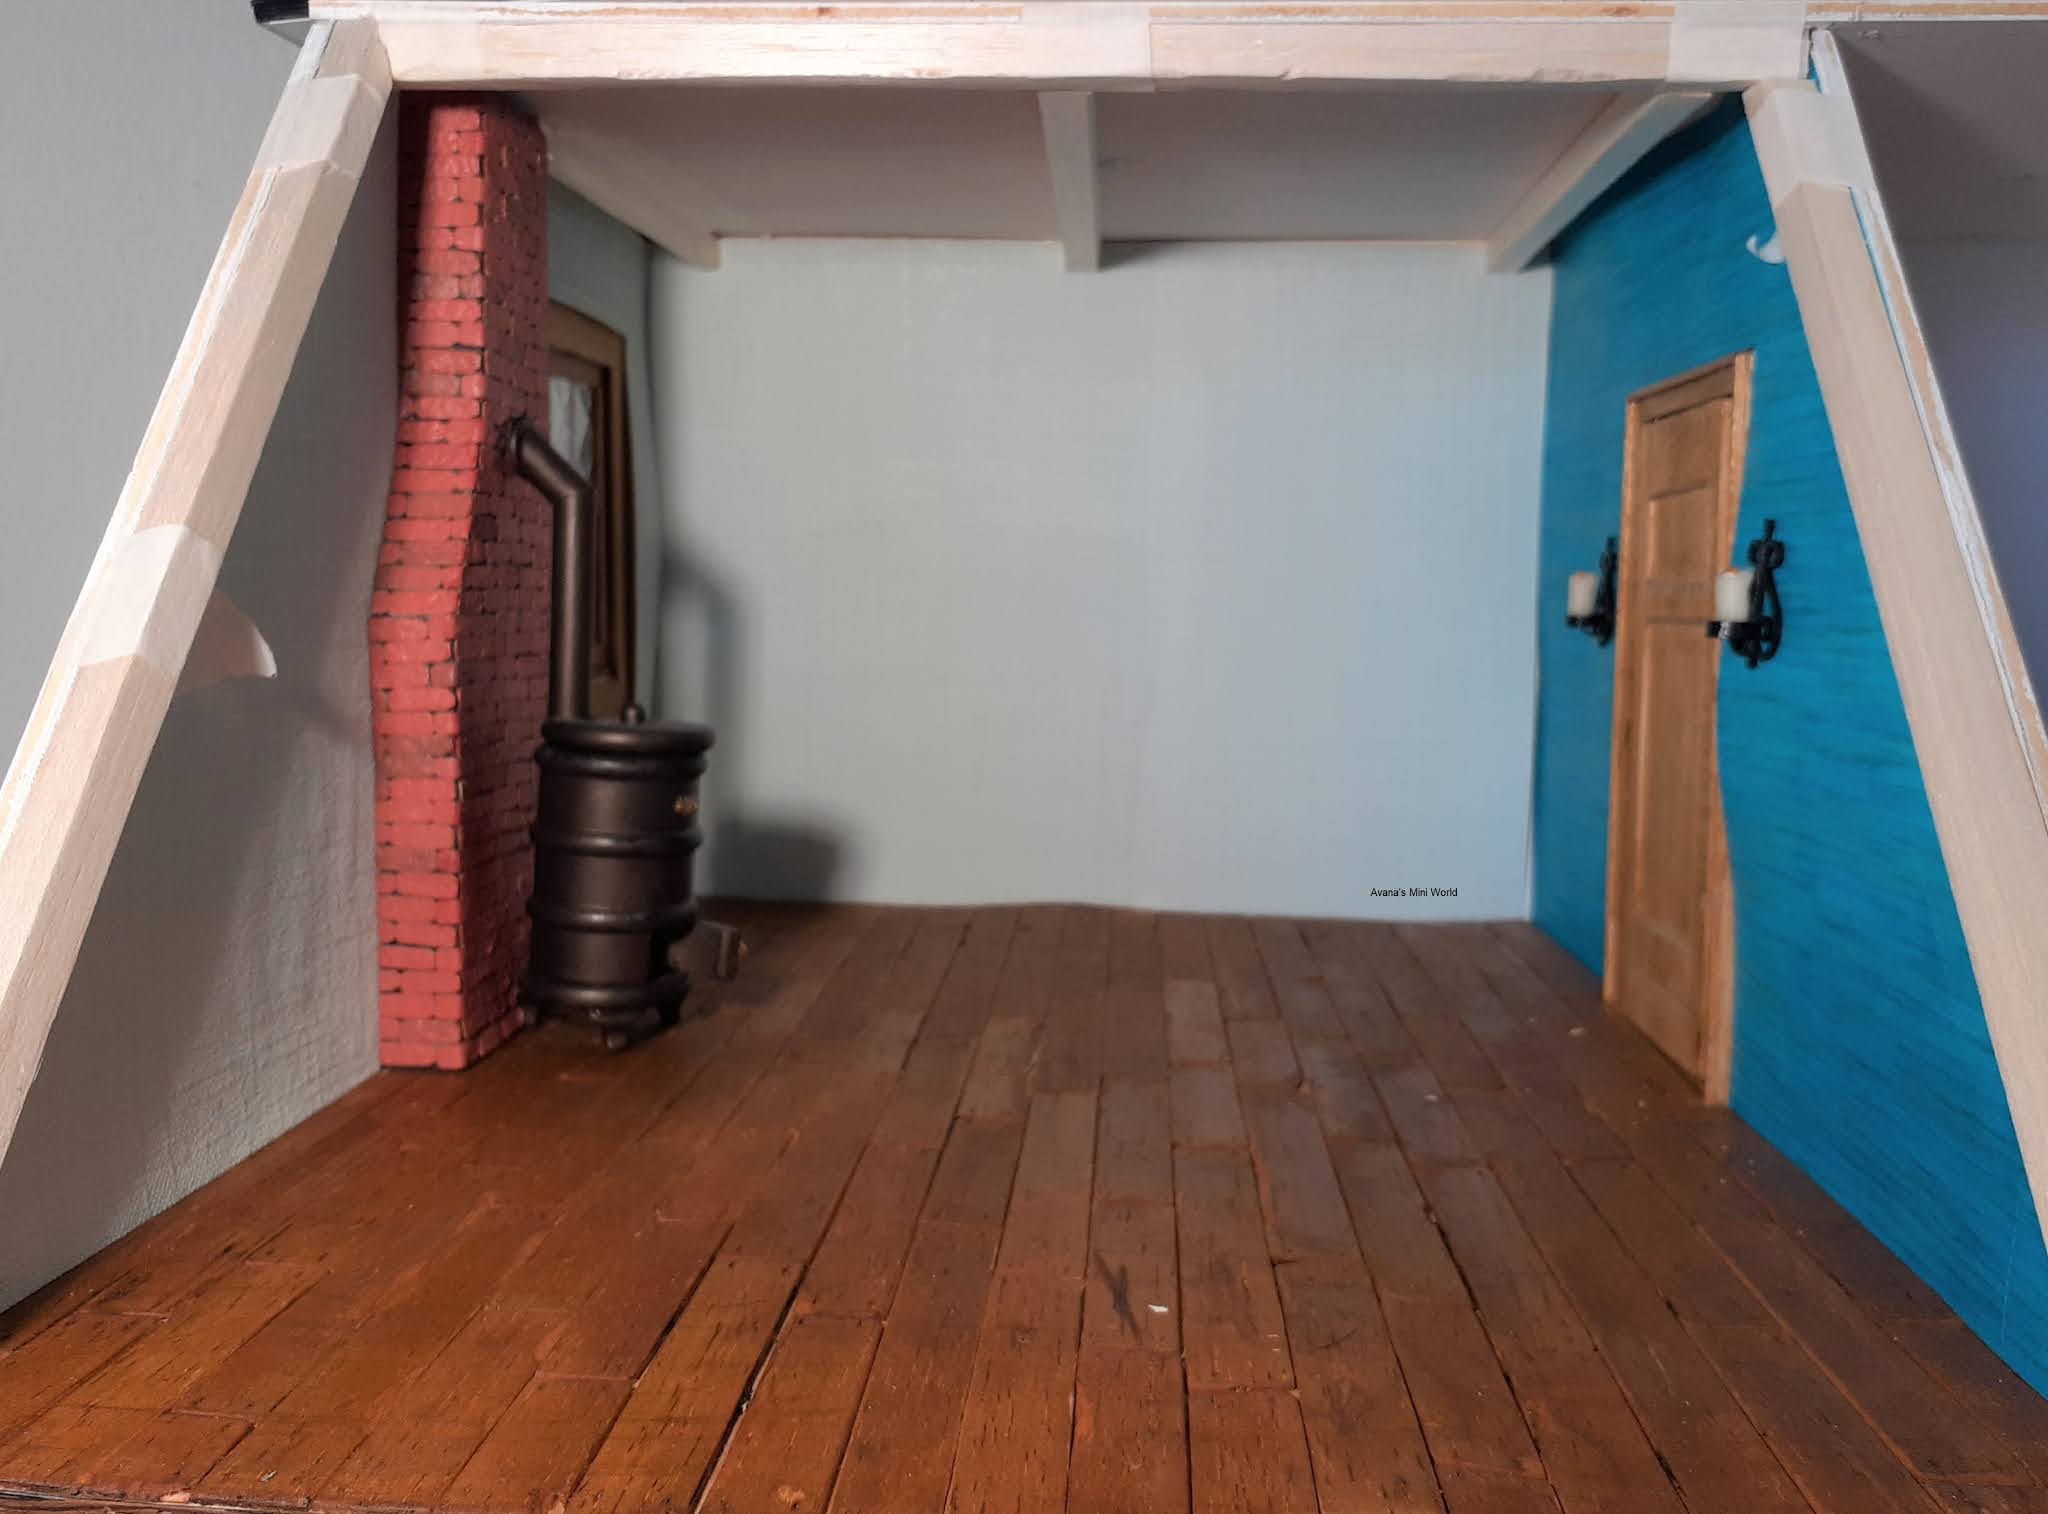
I've changed the layout of the room. Penny's bed is now at the 
front,  with room next to the fireplace for her dollshouse or a
desk or other play things. With the beds on the other wall you
could hardly see the potbelly stove and the window. 


I've beewaxed the wooden floor and put in the window sill. Next will be making the curtains and attaching the door handle. But for now I'm taking a little break to work a bit on my story :')

Monday, September 23, 2019

Another visit to the fair in Rijswijk, so many pretties!

I had a great time at the fair in Rijswijk yesterday :)
For the first time I didn't go on saturday but on sunday. It meant that I couldn't travel with Jolinda in the morning and had to leave at 7 am to catch the train, but instead I got a ride home when she left at 3 pm, for which I - and my feet - were very grateful ;)

Middelburg at 7 am <3

I'd arranged to meet Sandra again, whom I'd met last time at the fair. It was great fun to spend the day together at the fair, though we were a bad influence on each others budget ;)
It wasn't as busy as usual which we both enjoyed since it meant an opportunity to talk with the exhibitors/shop owners and look more thoroughly at some of the miniatures.
Talked with Louise of Gweaneth's Dream and Thea of Minidoor as usual, and we met Christel (from the FB group Actieve Poppenhuisforum as well) and her husband for lunch.

I didn't take any photographs at the fair, but of course I want to show you my precious ^^


I've been wanting to buy ornaments at Bindels for awhile now, but have always been a bit overwhelmed with the amount of shiny things when I stood there. So this time I came prepared, meaning I had a list with everything I wanted ;)


With the ornaments I'll be able to maker the following miniatures (hopefully :P). And I bought two 28 mm clips with smooth jaws, a tube adhesive for jewellery, and bronze aging patina (because there won't be shiny things in the Scottish cottage ^^

Set of two silver candlesticks (kit)
Photo frame
Drawer or cabinet pulls
Christmas Wreath kit

As alway I couldn't pass Jan van den Doel without checking out the lovely fabrics, which means I'll never leave empty handed (a) Those might be used for the cottage as well some day.


At Nalladris I found these kits for Gothic candles (cottages), bats and dragons (we'll see where I put them lol). You can apply jewelry glue to the DIY brass kits, to gain thickness before painting. An then fold the wings with pliers for a realistic effect. It will be a challenge but I like those very fun!


Some things I hadn't listed, but wanted anyway;

  • Floral tape at Omgardens, the only thing for making flowers, which is apparently something I still try to avoid ;)
  • Veneer slats at Bibian Angelique Miltkau (how to, in Dutch), which I thought might be useful in the cottage, perhaps for skirting boards?
  • An ornament at De Poppenkraal, which will be made into a mirror for the cottage entry.
  • Flower planters, I don't remember where I'd found those. Might be at Stella Que Pasa?
  • And a LED strip at Atelier Valkenbos, which I want to hide on the ceiling behind one of the beams, to get more light in the back of the living room.


Last, but certainly not least; this staind-glass window at Glaskunst in Miniaturen.
The photo doesn't do it justice, it's really lovely!


So, I had a marvelous day, and I'm looking forwards to work on the cottage again :)

Tuesday, September 11, 2018

Square wooden chandelier

This weekend I've made a chandelier for the living room of the Hogsmeade cottage. I had already been planning that but so far I had not seen a tutorial or example for one that I liked for a cottage.
Untill I found a great tutoral from Jennifer's Miniatures and instantly fell in love with that chandelier :)
Since mine would be hanging above the sitting area instead of a diner table, I've made a square one instead of a rectangular. Mine is made from Balsa and measures 5 x 5 cm and I used an oak woodstain to match the beams at the ceiling.


For the candles I used an (old) tutorial or Marike's Magical Miniatures from an old DHN magazine. This time I used even less Fimo cognac to mix with Fimo Translucent White.

Top: old baked ones with a bit more cognac
colour. Middle: the new baked candles. Under:
prebaked Fimo Translucent white with a sliver
of cognac colour.

I put a pin needle in the middle (before baking)
and carefully rolled it like a rolling pin to
make enough room for the wires.


I painted strips of black card board with lamp
black acrylic paint, and then put some
Fimo glaze on it (a)


I mixed a bit of the polymer clay with some vaseline till it
got sticky and then added (a lot of) Liquid Fimo for the
dripping effect on the candles.


I put the candles on a same sized piece of Balsa, covered with
tin foil, hoping I would be able to get some 'drips' hanging
from the wood as well :) And then I crossed my fingers and
wished the paper wouldn't burn ^^


Which it didn't ;) So time to put the little
lights in the candles, and check if it worked.


Using the heat shrink tube was a bit scary, because I kept
expecting the glue or the Fimo to melt ;) Maybe that's why
I didn't shrunk as much as I thought it would.


But I'm still more than happy with the result
and also a bit proud (a)


A photo can't even capture how wonderful it looks
with it's light on, but still! 


Before I'll put the chandelier in place I have to finish the walls and the floor, so that's a very good motivation ;)


Credits:
The lights I used are Nal-LEDS from Nalladris. I'll be used this system for all lights, candles and fire places in the cottage!