Wednesday, January 16, 2019

A rug for the living room

I alway got the impression that after building a house or room, and decorating it, the fun part began. Well, guess what ... I find it the hardest part so far :')
So many chooses, about colour and style, decicions to make, what to do when. I've known from the beginning that I want to have rugs in most of the rooms of the cottages. Lots of work, but I like cross stitching and I have splenty of time before a room is done.
But ... to know the colours for the rug, I'd need to know the style of the room, or at least the colour scheme, and I still don't know (for sure ^^). Same with the size of the rug; I know the furniture I want to place against the walls, but I'm still in doubt about the couch/armstairs.
And so I keep running around in circles; should the rug fit the couch cushions and the curtains or the other way around and so on ;)

My pinterest board with (designs of) rugs and carpets alone has 65 pins and I'm sure I have more (a)
Well, browsing again saturday evening I've found these needlepoint charts, designs by Anna-Carin Betzén, based on full-scale rugs. Her designs are all 1:48 and 1:144 scale, but I looked anyway :)

© Anna-Carin Betzén

I noticed an Afghan rug, circa 1900. It has 49 by 73 stitches and uses only 4 colours. While I was wondering how it would look in other colours I saw a note, saying: "Add more repeats for a larger rug. Many afghan rugs have much smaller octagons, so with more repeats this design could easily work in larger scales."


So I selected DMC embroidery threads in four colours, fabric I already had (might be 16 stitches?)  and started right away :) I figured beginning in one corner would give me an idea of the size and how many times I would have to repeat the octagons. 
When I'd done the top row of the pattern it was 4,5 cm, so I might have to repeat the original designs twelve times :')


Since I didn't want a repeat of the edges everytime I spent an hour copying and pasting in Paint untill I had a design I liked. I can alway decide to add or skip octagons when I've furnished the living room of the cottage :)


Only bad thing about starting right away; I had choosed the colours to match a scrap of the wall paper I used for the living room (left). It matched great in the evening but a lot less in the morning, and then I discovered it wasn't even the right wall paper to begin with (that's the one on the right ^^).
Anyway, I like the colours - and I didn't want to start over :P - so I'll just keep these and we'll see if it will match the living room.

Of course, once started I can never stop until the design and colour scheme starts showing, so ... this is the progress so far :)


Saturday, January 12, 2019

Update on the Italian project

It's been awhile since I had some progress to show you on the Italian project. I think it was back in August :')
In the months after we did some other things at the meetings of the miniature club (making dolls, well body parts at least ^^, and nutcrackers) but at the next one - in two weeks - we'll start working on our projects again.
With that in mind this week I did some work on the outside of the trattoria, because that's kind of hard to do somewhere else. I can't take the mountain with me ;)

First though, I thought I'd show you some photos, I hadn't before apparently (from before August);

I'd added some green paint to the mountain.

Working on a wooden balustrade

Starting on the staircase. Had seen a tutorial
 about airdryed clay covering wooden steps, so
I dismantled one of the earlier cottage stair-
cases and used a glue gun to make the base. 

Covered in air dried clay.

The balustrade got a walnut stain.


And then, this what it looked like when I blogged about it in August:


So back to this week :)

Instead of using paper shutters I've started
again and used an old (cottage) door :)

I cut the door in half and the right length
and resized and printed a picture of
shutter hinges.

The window frames have been painted, the hinges
cut out and painted with black lamp acrylic.
 
The hinges and shutters are just glued in place. Since the front
of the frattoria is supposed to be the background for the project
 (don't laugh :P) I didn't want to bother making movable
shutters (a) Behide the window is the Chianti fiasco
Kim made me.

Although the inside of the bistro will
stay empty, I've decided it still needed
same painting because of the glimpse
you get through the window and door. 

 
So after painting the walls and adding a paper floor, I glued the
 door in place and added an 'Aperto/Chiuso' (open/closed) sign :)
I've also added some off white chalk paint to the
staircase to highlight the cracks.

Next step; if I am absolutely certain that I
don't need to be on the inside again, I can
glue the front wall in place and finish the
 balustrade. 

I'd like to make a flower box just below the window and maybe a awning above the door or window, so that will be something I can work on at the next meeting with the miniature club ;)

Sunday, January 6, 2019

The last miniatures of 2018

First week of 2019 is almost gone. About time to wish you all the best for the this year, in good health, with time for loved ones and lots of creativity :) 
Before I'll make all sorts of plans for 2019 I want to show you the last mini's from December  #planningprovidespeaceandquiet;)

We zitten al weer bijna een week in 2019. Hoog tijd om jullie het allerbeste voor het komende jaar te wensen, met gezondheid, tijd met dierbaren en veel creativiteit :)
Verder wil ik nog even het eea van december laten zien voor ik allerlei plannen voor 2019 ga maken  #organiserengeeftrustenruimte ;)


I made some more workshops from the Advent Calendar of the Actieve Poppenhuisforum FB group. 

Ik heb nog een paar workshops gemaakt uit de Adventskalender van de Actieve Poppenhuisforum FB groep.


A pouffe with an open lid (quilt fabric from Minidoor), a rustic twig star covered with moss, and a candle with wreath. 

Een poef die open kan (quiltstof van Minidoor), een bemoste kerstster en een kaars met krans.


The last workshop I did was this centerpiece, from a flat beer bottle cap and a push pin :)

De laatste workshop die ik gedaan had was van dit kerststukje, met een platgeslagen bierdop als schaal en een punaise als poot :)


It's the one I am the most happy about <3

Het is gelijk ook degene waar ik het meest tevreden over was <3


My own contribution to the Advent Calendar was a workshop for a bird feeder. A lot of fun to make. It was posted on December 22nd, maybe a little too close to Christmas so not many people did get started, but I have seen at least two very nice versions :)

Mijn eigen bijdrage voor de Adventskalender was een workshop voor een vogelvoeder huisje. Erg leuk om te doen. Het werd gepost om de 22e dag, dus iets te dicht tegen de kerst aan dat veel mensen er nog mee aan de slag gingen, maar ik heb iig twee erg leuke versies langs zien komen :)


Tuesday, December 18, 2018

Crafting together & and other christmassy things

Last week our little crafting club met again. We had decided to make some Christmas miniatures instead of working on our own projects.
I'd thought it would be fun to make a nutcracker together like the one I'd made a week earlier, and the other girls agreed :)
I had made us little kits with the materials needed, but it was still frustrated - but fun - to put all the parts together and paint the nutcrackers ;)
Together we must have made at least ten noses, which went flying the moment we wanted to dab some glue onto them 😂
But in the end we each had a finished nutcracker. Standing beside a Christmas tree ornament you can see how tiny they are. Approx. 2 cm :)


Since I already made a red one, I went for green this time :)
I think it's fair to say we each had problems with painting the faces, they do look a bit creepy, don't they? :')


But fortunately, you won't notice that when the nutcracker is surrounded by other miniatures (a)
I'd started making a Christmas market stall two years ago but hadn't set it up untill now. Though it's not finished yet, I like the display of - mostly - selfmade miniatures.


Hopefully next year I can add some to the surroundings :)


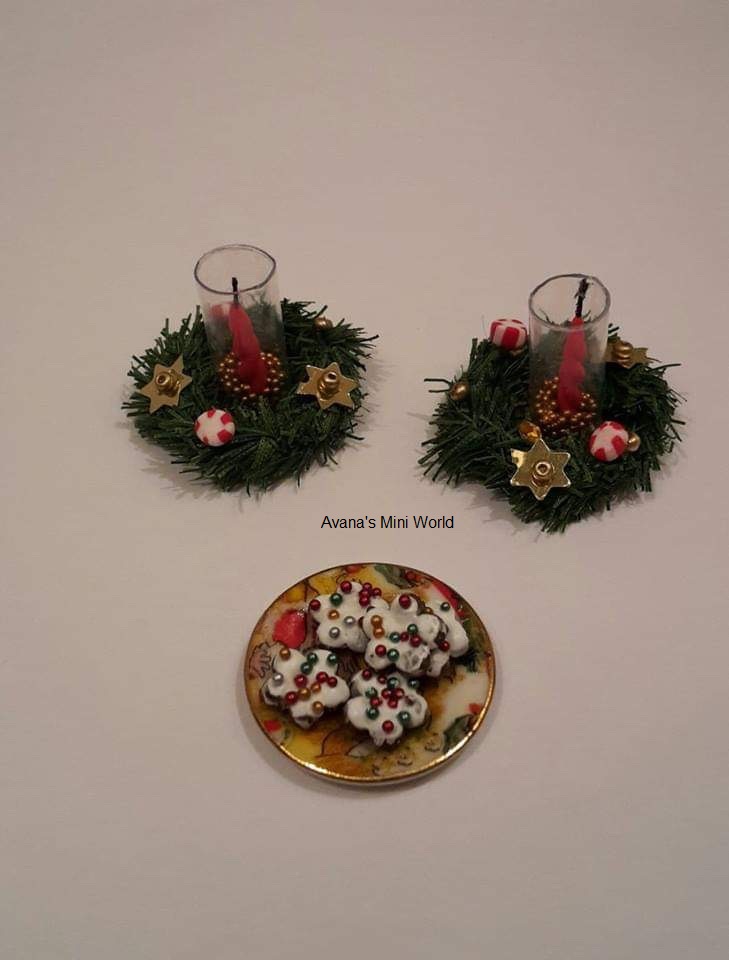
I've also made these centerpieces last week, and some Christmas cookies which I put on the Christmas plate I've bought in England in May :)
A tutorial for the centerpieces and cookies was shown in the latest Dutch dollshouse magazine P&M.


The Nutcracker is one of the most beloved Christmas stories of all time. It has been adapted into a ballet, as well as many television and movie adaptations.
The story is adapted from a story written in 1816 by E. T. A. Hoffmann called The Nutcracker and the Mouse King, which tells the magical tale of a young girl whose Christmas gift, a nutcracker, comes alive.
Hoffmann's story is of a young man, the nephew of an inventor called Herr Drosselmeyer, who fails to complete the task required to marry a princess. As a result, he is cursed by being turned into a nutcracker with a large head, wide grinning mouth, and beard. She rejects him for being ugly and he is banished. Drosselmeyer gives his goddaughter, Marie, a nutcracker for Christmas and tells her the tale. After various "dreams" in which it comes to life and they defeat the evil Mouse King, Marie tells it that she would never reject him as the princess did but would love him no matter how ugly he was. This breaks the spell and Drosselmeyer arrives with his nephew, magically restored to his handsome self. He marries Marie and takes her away to the magical kingdom.
In 1892, Pytor Ilytch Tchaikovsky set a variation of Hoffmann's story by French author Alexandre Dumas to music. Then, together with renowned choreographer Marius Petipa (working with Lev Ivanov) they created the ballet "The Nutcracker". Source


A surprise from abroad

The previous weeks have been a bit chaotic and challenging on many levels 😏
Among other things, my hard disk died and even though I always save everything in a cloud, I haven't been able to recover any data. Well, nothing but the miniature related files and photo's which happen to be in another cloud :') (writing English is hard enough, but writing about computer stuff is even harder ^^)

So, it definately made my day (and week ) when the postman rang (just once :P) and delivered this parcel from my dear friend Kim, from Bibbidi Bobbidi Boo.


The best things come in small packages!

It's all so gorgeous and incredible tiny! I had
to hold my breath or the quill and ring would
have been lost :')

Together with some other items she included. I'm sure Bianca
of the Hogsmeade cottage will be very pleased with all of these!


Monday, December 3, 2018

Inspirating from ánd for 1:12 scale decorating

November has been more about decorating my 1:1 scale living room than about the 1:12 scale cottage :) Though the first inspired me to do miniature versions and the other way around :)

 
 The living room, which had been done in red (with gold) and white
 (well, after 18 years the walls were more grey-ish ^^), has turned to
 cottage-green with off-white/beige.

I glued some fabric on terracotta flower pots, covered them with
Gesso (primer) ...

... and painted them with the green wall paint. Also covered
a pink flower vase that had been my grandmother's :)

Like the new flower pots with the green of the leaves!

Then I wanted some lace covered flower pots
for the cottage as well :)

Almost looking brocante, I think ;)

Painted more little pots cottage-
green as well as the mantel piece (a)
  
 I've always wanted to have a little fairy door, so I decided 
to make one ...

... and cover the opening from where the gas heater used to be.
I will decorate it with ivy and flowers some other time :)

 
Then I pimped a light fixture - I'd gotten to install above the dining/craft table - 
with trims from lace curtains and painted it :)

Wanting to do some miniatures again,
I made this tiny nutcracker.

Though the doors and posts still need to be painted the living room feels so much more cosy and warm. Starting to look forwards to the holidays now :)
Time to start making (more) Christmas miniatures!