Sunday, March 26, 2017

A bed for Penny

When showing the non-sewing quilt I made I used Draco's four poster bed in the final photo, but that didn't feel right. So I put the quilt away for the time being because, of course, I wanted to make a bed for little Penny next :)
I decided to make the bed based on Julie Warren's tutorial (left), but with the head- and footboard I found in an other tutorial (right).


One tutorial was in cm, the other was in inches, so lots of adapting needed to be done, and then they both happened to be double beds, so I had to resize - and remeasure - everything to a smaller size as wel. Secretly I liked the measuring and drawing part though (a)


Can you tell I love masking tape? (a) I'd be lost without it, ghe ghe


I used tiny doorknobs, bought at Minidoor, to decorate the head- and footboard.


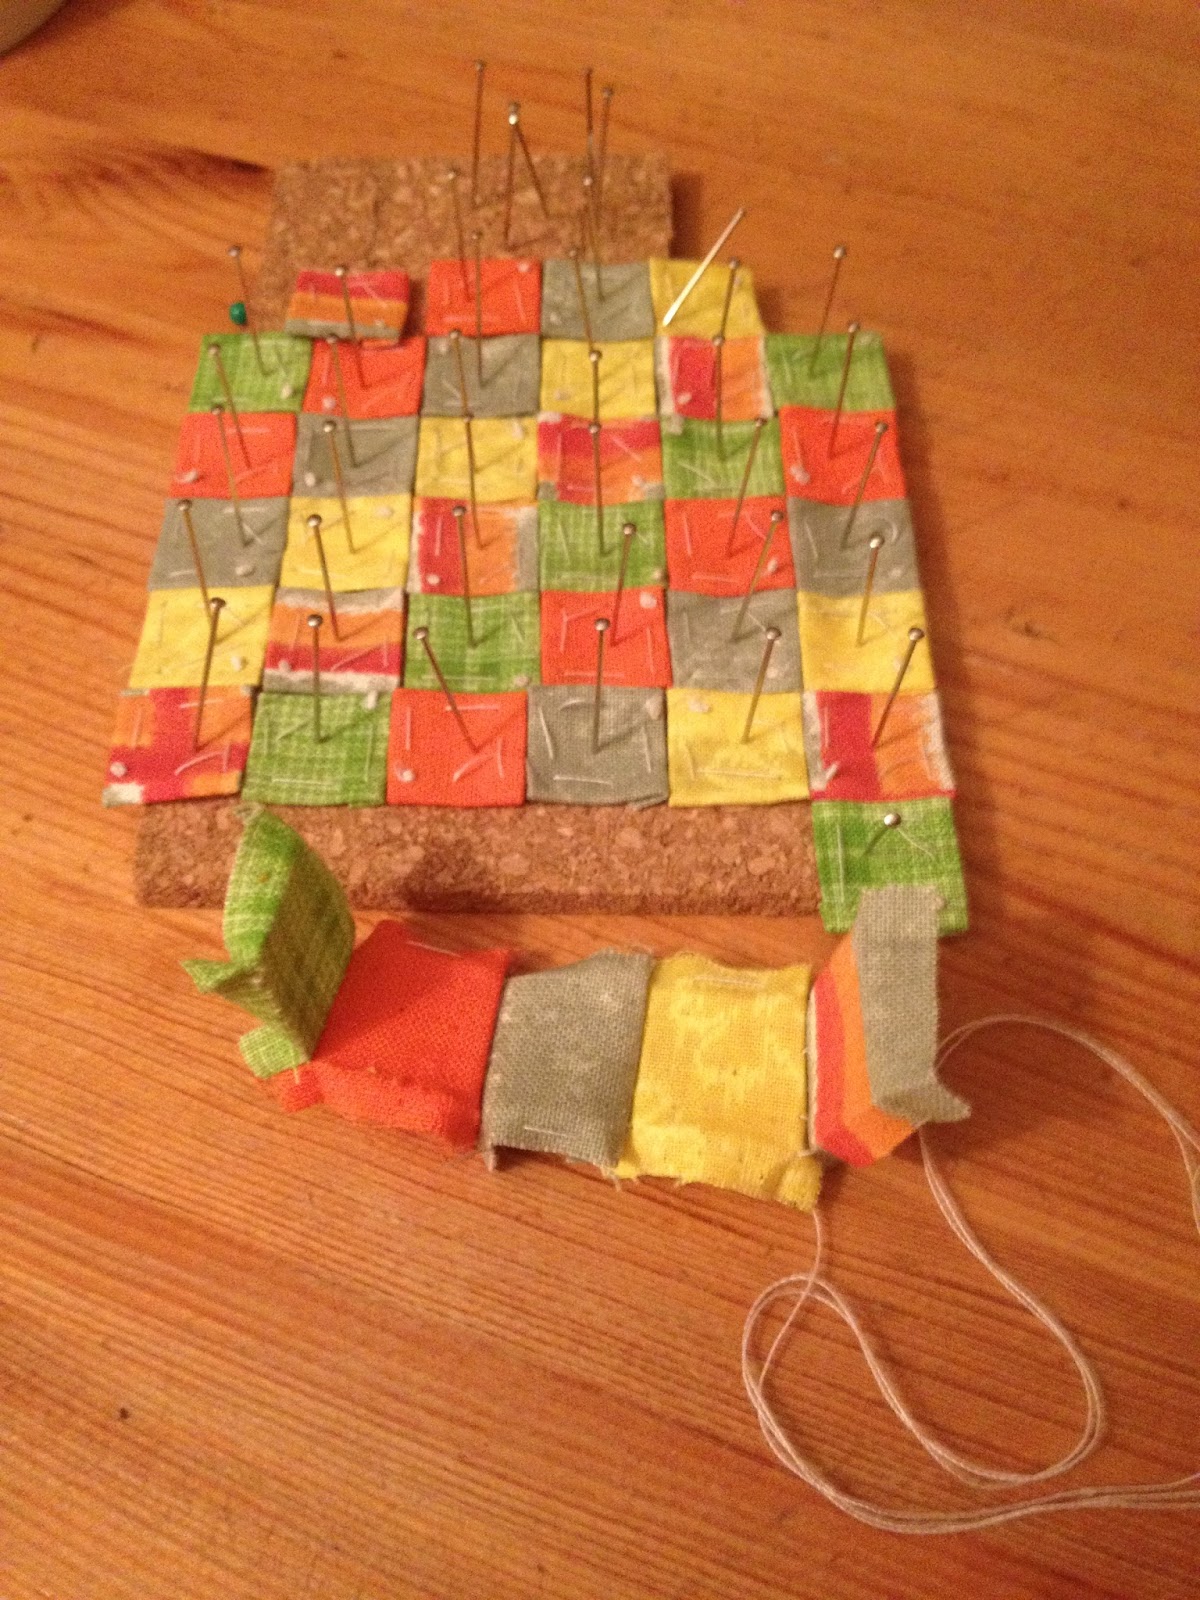
After I finished Penny's bed I couldn't find the quilt anywhere o.O I looked everywhere, untill finally I found it. Someone took it!!


Harry was just trying to sneak into the bed also, when I came and started making photo's (a)


After a lot of arguing - and the promise to make them a quilt too - I could place it on Penny's bed :)


I thought mother Bianca should get the same bed (with other bedding of course) because it might look weird having two different beds in one small room. It's not the same as with the different kitchen chairs, I think. I image (since they rented the cottage furnished) that there should be two single beds that could be shoved together for a couple :') Unless a previous tenant must have broken the bed and it had been replace by a different bed (a)


The first bed ended up becoming Bianca's bed, because lack of space in the attic room asked for a smaller second bed. Wish I could make it less long as well, but even old cottages probably have decent beds ;) Without the legs and boards there could be even more space but I decided against that.


After seeing the quilt on the four poster bed, I decided not to paint Penny's bed but stain it. I like the warm colours of wood for an attic room. This time I didn't use the oak stain like I did on the table and chair seats (the square in the middle) but used two different shades of brown shoe polish.


So on the right side is the smaller, lighter bed, which will be Penny's, and the left, regular single size bed with darker shade will be for Bianca.

Saturday, March 18, 2017

Quilting, a non-sewing version

Sometimes I get the urge to do something totally different from what I'd been doing the previous days. In this case, after making furniture for the kitchen and cutting openings for windows I wanted to do something with fabric, so I decided to make a quilt  #noconnectionatall :D

I looked at a lot of tutorials and decided to follow these instructions. I measured and cut 80 squares of five different fabrics, and 80 pieces of paper.


I tacked the fabric to the paper, wrapping 5 mm over each edge. 


I pinned those squares to a little cork board to try different patterns.


Unfortunately, after I made 36 squares and attached the first 5 together, I had to give up because it turned out to be too straining for my shoulder and arm (muscles). Something that also prevents me doing macrame at the moment.
I decided to try the non-sew method instead (a) Won't be as neat and pretty as I'd want it to be, I think, but hee, we can pretend Bianca probably isn't as good in sewing ;)


I opted to make use of this example.
I used an old coton pillow case, draw 8 by 10 squares of 1,5 cm and taped it to my cutting board.


Starting in the middle (well, at one of the four squares in the middel xD) ...


... I glued the first piece of fabric, right side up.


The next piece is glued with a sharp fold/edge, on top of the first one, following the pencil lines.


Third square on the opposite side.


The fourth and fifth close in the first square.

For the next four - corner - pieces, I folded two sides and cut a bit of fabric to make it less bulging.


I used some extra glue to secure the fabric at the corners.


And I drew new pensil lines after I'd done a row.


Then I repeated it with a new round of squares in the same order; first the ones in the middle, then the ones on either side and I ended with the four corner pieces.
In the next photo I'll show you the order in which I glued the fabric.

All 80 pieces glued in place.


The only thing I was not happy about were the transitions (?) between the squares, but I looked through all my craft supplies and found some tin ricrac I could use to hide every corner that isn't neat xD  I ordered more of the trim at Minidoor, and some in an orange colour in advance. When it arrived the next day, I glued the trim. Since they tended to get loose at first, I put some pressure on it, one square at the time.


I liked the orange fabric as a border. I tried it with green but I thought the colours of the quilt looked warmer with orange beside them xD


I'd decided to sew the back of the quilt instead of glueing it, but of course you could use either technique.


Between the back and front I put a piece of terry fabric, and I added some thin wire to the longer hems so I'd be able to make some folds.


Since I hadn't made a bed for little Penny, I put it on Draco's four poster bed to show you ;)


Wednesday, March 8, 2017

Kitchen plans

After making the first two chairs I thought it would be nice to make a cushion in between other crafting, but then I realised I still didn't know what colours the kitchen would get, and worse than that, I was not exactly sure if the table would fit in the kitchen at all :')


The table looked so big I thought I'd better decide what other furniture I want/need in the kitchen, because I didn't have a clue xD

Shell Cottage - Harry Potter

So, the next hours, I did research on (cottage) kitchens and stoves untill my head exploded. I googled Weasley kitchen, Shell cottage kitchen. Julie Warren's kitchens, including the one from her book, looked on my boards on Pinterest ...
And here I thought I'd planned to start with the living room first o.O 
I only wanted to know if the table would fit into the kitchen and I could choose the colour for the chairs :')

In the end at least I had a better idea. I think :')


So of course, I made a new plan drawing, ghe ghe.

Photo from Mockingbirdhillcottage

 I like something like this as a sink unit.

Photo from Poesenpoppenhuis

And I found a Dutch tutorial for an AGA stove. Wouldn't paint it black though.

Then I wondered if witches would have a fridge/freezer in their kitchen? Kim suggested
a fridge concealed behind a wooden door, built in rather than free standing. Something like this vintage fridge from The Vintage Fridge Company.

Sunday, March 5, 2017

Matching kitchen chairs

After making the table I just couldn't resist to start with making chairs :)
My son advised me to have at least two chair that are the same instead of them all being different. More realistic that way, like there were originally four but two were replaced when they broke. 
Those two are the chairs, matching the table, from Julie Warren's book.  


The meassuring and cutting of the wood was very straining, since I can only do that correct (all those 2 and 3 mm strips) without my glasses and bending over till my nose almost hits the table top. That's why I only cut 1 or 2 pieces each time.


I wait extra long for the glue to dry, since it's so fragile. You can see, how they're going to be in the book, it's in the corner of the photo. 


It was fiddly doing the chair but I've become more patient then when I was when I started with miniatures a year ago. It really has more to do with being a perfectionist, I think.
I cut 7 chair seats before I was satisfied with the size (a)


After I finished making both chairs, I stained the seats. Also stained the top of the cabinet (3 layers xD) and varnished the table! The chairs will be painted another time, when I know better which colours I want for the kitchen.


I put the stool into the scene just for the photo but it might end up in the cottage as well.