Monday, March 12, 2018

The Hogsmeade house is halfway there

Last week I've told you that I was going to put the walls and floors together with the help from my dad.
I should have know we wouldn't be able to finish it in one afternoon though, since half way through we had to stop untill the glue was fully dried. And that would take some days.
We worked for two hours because my dad is even more of a perfectionist, so each wall and each floor was checked with a spirit level, and checked and checked .... :)

So, this is what my dinertable looked like for three days;


After I removed the tape wednesday evening, I noticed the first floor had shifted before the glue had dried. Probably because the wood was a bit warped to begin with (a)  In the middle the level was right, but on both sides the floor was glued to the walls 1 cm too high.

The top and back panels are not glued yet.

I had to remove the glue with a knife and then start over (a)
Also, a window got loose so that's a bit too chilly for Bianca and Penny :)


After I did it over again, I've glued the roof in place.


Tomorrow my dad will come and help me again with rasping and sanding all the rough edges before we can hopefully attach the back wall ;)


Monday, March 5, 2018

Exciting day ahead

A little more than a year ago I decided on a new project. Something bigger than a roombox, but not as big as a large house with multiple levels ;) And of course I wanted to do as much as I could by myself (a)
It's been a year with a lot of frustrating moments when things didn't work out how I wanted them, but the satisfaction each time I finally managed, kept me going.
And today, with the help from my dad, the walls and floors are finally put together (with something more lasting than tape ^^).
I've been checking and doublechecking everything for the last couple of days, and made some last minute adjustments, but I'm ready for it :)


I also used my 'Dremel' quite a bit the previous days after I figured out where I want the wiring to come. Sun from Nalladris, where I bought the lighting and electrical supplies, helped me out as well.


I made the back wall, drew the lines for the inner walls and other markings, drilled some extra holes - one for a cupboard light - and did some trimming on walls where needed.


In between I've reread chapters from the Harry Potter books about the Burrow to find common household items and cleaning products. Because I have a cupboard to fill, right? ;)
I found already more than I thought I would.


Thursday, March 1, 2018

A cupboard under the (new) stairs

A little more than a year ago I started making a straight run staircase for the cottage  (Building stairs). After a month I discovered some problems so I changed the staircase to one with a 90 degree turn both on the top and on the bottom (Struggling with stairs ...)
I knew I still had some work to do, especially since I didn't know at the time how to do the handrail and balustrade.
After I put the cottage together again last week, I spend some time researching that. There was the fact that the stairs consisted of different parts of previous made stairs and definately looked that way. Also I figured that the staircase didn't need a turn on the bottom any more ;)


I decided to make a new staircase (a) You already figured that out, didn't you? ^^
While I was at it, I thought about the space under the staircase. Being a huge Harry Potter fan, it wasn't hard to come up with an idea. A nice cupboard under the stairs with storage space for Bianca, as a wink to the Boy Who Lived ;)

Set photo by www.catterflyworx.com

So, after taking some measurements and checking and double checking I started all over.
I've used plywood for the side where the door will be. It's the same 4 mm plywood that I've used for all the cottage walls. The other side, which will be glued to the wall between the entrance hall and the kitchen, is 3 mm Balsa.


Just checking if the opening is still wide enough for the new stairs :)


The treads and risers are 2,5 mm Balsa. Most of the risers are already glued in place. The turn at the top was the hardest. And I needed to figure out where the bannister on the bottom of the staircase should be.


I'd brought some spindle, bannisters, handrail etc at WAM miniaturen, which arrived soon.


Now I have a better understanding of how to do the handrail and the ballustrade, though I've decides not to make it before I'll have checked if the staircase fit 100% next week :) That's when the walls will be glued together. Yay ;)


But I could already finish the door. This time with hinges, but not the hard (and realistic) way; I just put them on the outside. And even that was hard enough  ^^ Glued them with superglue and them I snapped the ends of the nails and glued the head on the hinges for decorative purpose only.


Next I experimented with colours and structures for that wall. Top is a mix of grey structure with plain white paint, middle the same with a bit of bird sand for more structure, and the bottom one has a bit bit of azure blue paint added.
Eventhough I liked the bottom one very much, it might be a bit too much structure for the small wall and door, so I've chosen the one at the top.
But I'll keep the other in mind, maybe for an outside wall?


I finished it off with some Balsa slats (1,5 mm), oak stained, and a door knob.


Maybe I'll decide later to do some aging on the wall, but for now I'm very happy with the result. Let's keep my fingers crossed that the staircase will fit perfectly between the other walls.
Monday my dad will come help me so the walls can finally be fixed in place. Very exciting and also a bit worrying (a)


Wednesday, February 21, 2018

Nightgowns and Dutch foot stoves

Making a nightgown and a cap for a 12th scale doll can be challenging, especially when the only item of clothing you've made so far is a wizard cloak.
However, if it's a birthday present for a good friend, you'll give it a shot anyway :)
But when the doll can't try the nightgown every now and then, because he's living across the pond; when he's handmade and isn't exactly on scale, and when he even doesn't have feet (yet), it becomes nearly impossible ;)
But after starting over and over for a couple of times, I finally figured out a design (based on the picture I'd gotten) :)

My third attempt :)

Still too wide (a)

Finally sewed all seams, for the hemming
I'll use textile glue.

Deciding on the trim.

Looks very big, but Harry isn't very tall xD

Draco only wanted to model the cap. Once!
Because it messed his hair too much :D

Footless or not, I also made some slippers
and a foot stove to rest his ... uh ankles ;)

Final touch; two snap fasteners at the back, to make sure
it'll fit a British wizard.


When I get pictures of the elderly British wizard, I'll definately show them but for now ...

I convinced Harry to model one more time
be putting a nice armchair in the scene ...

...though he complained about the fact that I
gave him a book but then forgot to hand
him his glasses :')


After my friend had received the parcel,  I discovered that a foot stove isn't very common in Brittain, so I had to explain that it isn't a little table :)
A foot stove consists of a wooden box which is open on one side, with holes at the top. In it, a bowl made of pottery or metal with burning charcoal was placed. The feet were positioned on top of the stove to become warm. By putting a blanket or clothing on the legs the heat could be isolated and the lower legs were heated.
I also didn't know that it's a typical Dutch foot warmer. I remember my grandparents having them (not sure my parent did at one time), so it's nice to learn more about it accidentally.
So, I'd like to share that infomation of course.


Dutch foot stoves
 Mid-17th century paintings with women using 
foot warmers of the fire pot in wooden box kind. 
All by Dutch artist van Brekelenkam.

The Dutch used to be known for a certain kind of foot warmer found alongside other household furniture: a pierced box with an earthenware or metal pot holding glowing coals inside. They called it a stoof (stove) and you can see it in countless paintings from the 17th century on, like this one by Cornelis de Man c1670.
These foot stoves were also common in northern Germany. A stone slab was an alternative to the wooden top with holes. Similar foot-warming “boxes” were known in other countries too: see this French chaufferette. In Britain open fires were the most popular way of warming yourself indoors and foot warmers were not much used in the home, but some craftspeople had an earthenware pot of coals for heating their workshop, and this might be placed under a footstool.
Foot warmers are visible in the paintings, but they could be completely hidden under a long skirt or cloak. They were used more by women than men. Did men’s boots keep them warmer?
 Typically Dutch foot warmer (top) without its inner pot. 
Also a foot-warming "stove" from Northern Germany 
with stone top. Photos by Johan and Nyks

Monday, February 19, 2018

Progress on the terracotta shawl

I thought I'd show you my progress on the new crochet shawl I started a week ago. Even though I've been busy working on the cottage doors (and I can't crochet for more than ten minutes at the time) I made progress :)
Still love the colour and the pattern a lot!

Last week


This weekend two dear friends came to visit me. It's a once a year visit and I had a great day. One of them gave me this marvelous little music box. The box is gorgeous, I think, and maybe I can place it somewhere in the cottage as a trunk. 
She'd also found me some spindels and stair-banisters. Very convenient since my cottage stairs still need those :)


And it plays 'Hedwig's theme' <3

Video by Invenio Crafts

Sunday, February 18, 2018

Doors for the Hogsmeade Cottage, part 4

I've finally finished the inner doors for the Hogsmeade (Scottish) cottage! :)
Not perfect by all mean, but after all the struggles they gave me, I'm more than happy with the result ^^
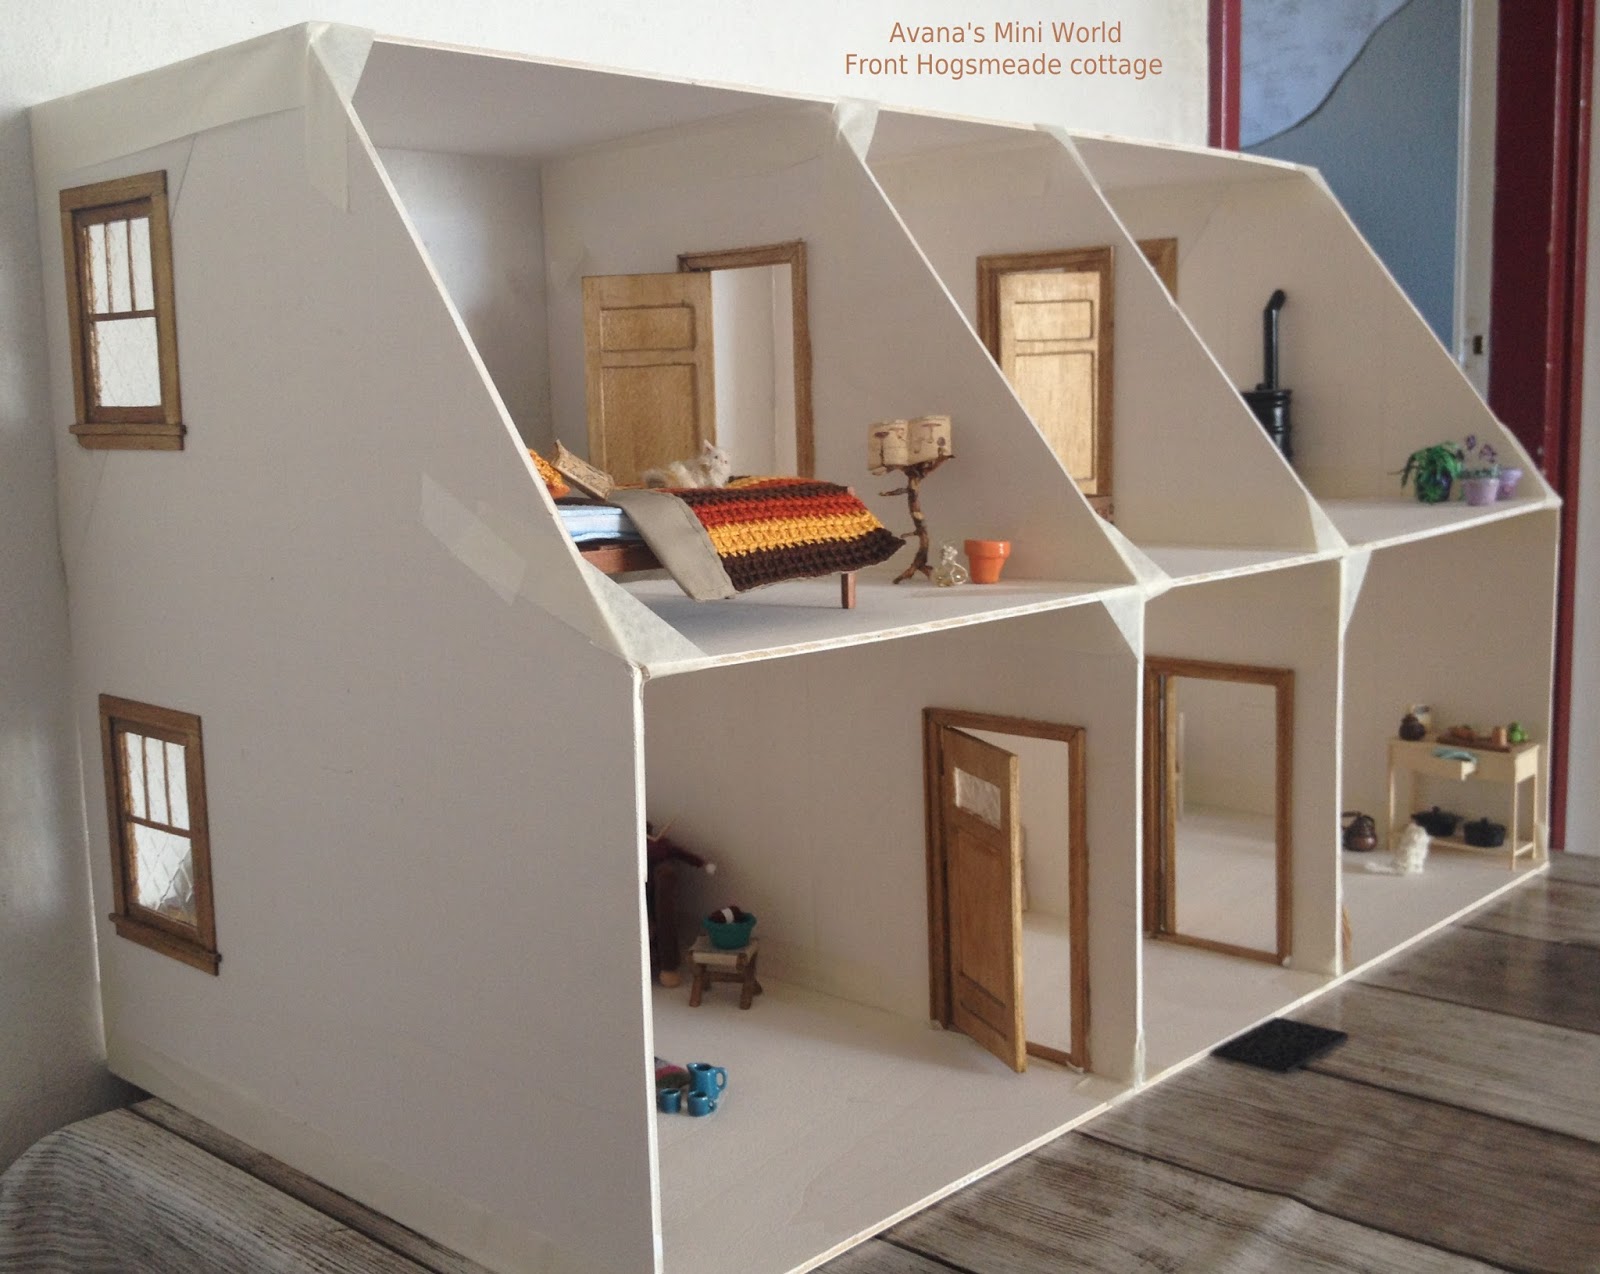
Once they were finished I couldn't resist putting all the walls together with lots of masking tape. Not only for fun, but also to give me a better understanding what I need to do next. It also gave me a boost for the next part.
Of course doing some home decorating was purely for my pleasure, though I hope you enjoy the photo's as well ;)


Not everything inside will eventually end up in the cottage but most of it will.


Most miniatures are made by me, some be others. Such as the Kneazle (cat) and the tree-like bookstand, made by Bibbidi Bobbidi Boo, and the books on the bed and the bookstand are by Marike's Magical Miniatures.


The furniture won't stay in the cottage, but I haven't made any for the living room :)


The stairs still need some work, so this is a good opportunity to have a good look.
Pixie is by Georgia Marfels, Parcels by Bibbidi Bobbidi Boo.


The least idea's yet for the bathroom, other then the colour, lilac/lavender :)


Apple pie cutting board and Kneazle (cat) made by Bibbidi Bobbidi Boo.