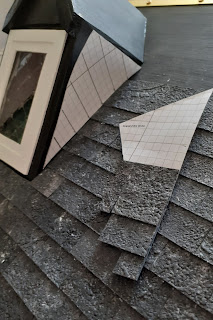
After making the first slate tiles I painted three more sheets of (wall) paper (50x30 cm) and cut them in 3 cm width strips. Cut each strip in 12 squares, so that made about 800 slate tiles (3 x 2,5 cm). It looked like I was working in a slate factory :)
Next I cut the openings for the windows in the plywood and painted the roof with acrylic black. Just in case there would be tiny gaps between the tiles.

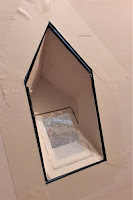
It already looked very different with the dormers and windows finished even though they were not stuck to the roof.
The inside window frames will have to wait until I get to decorating those rooms.
Although I am going to make beams as a support for the piano hinges I realised I still needed shorter screws for the other half of the hinges because I couldn't use beams on that side. Fortunately my dad came to the rescue. He did have cutters/pliers and was so kind cut the screws. And so, I could secure the first hinges.
Next thing I should so was connect the dormers to the roof but instead I started with glueing the tiles. I could tell you I was curious how the tiles would look but the truth was I was avoiding doing the dormers lol
Another thing I needed to figure out was how to make the lead slab. My idea was to make it from aluminium tea light cups but that turned out looking too bright and shiny.
I asked the FB group advise on how to get the aluminium matt/dull and got multiple reactions. Some gave tips about painting the aluminium, others suggested thin strips of clay or offered me information on where to buy real lead (strips). I started with the first tip (because buying something is always a possibility).
I sanded the strips lightly and then drybrushed it with a mixture of black, grey and blue acrylic paint. It doesn't look too bad, though still a bit too light imo.
I sanded the strips lightly and then drybrushed it with a mixture of black, grey and blue acrylic paint. It doesn't look too bad, though still a bit too light imo.
While I was thinking about those lead slabs, I finally attached the dormers :') They didn't fit perfectly, so I lined masking tape along all the crevices and gaps, on both sides and also on the outside.
I filled up the gaps carefully using the glue gun and smoothed it out with a cocktail stick while the glue was still warm, When the glue was hard I removed the tape and some bits of the excessive glue.
Thankfully the masking tape on the front had kept the glue from leaking.
It is not the most attractive solution but everything will be covered either by tiles or wall paper anyway :')
It is not the most attractive solution but everything will be covered either by tiles or wall paper anyway :')
I spilled a drop of glue from the glue gun on one of the glass windows, so I will need to replace that unfortunately :') Or I could place an owl on top of the dormer and blame it for dirtying the glass (a)
For the sides of the dormers I made a template first.
Of course I needed to make four different templates because none of them is exactly the same, even though they differ just a few millimetres :')


